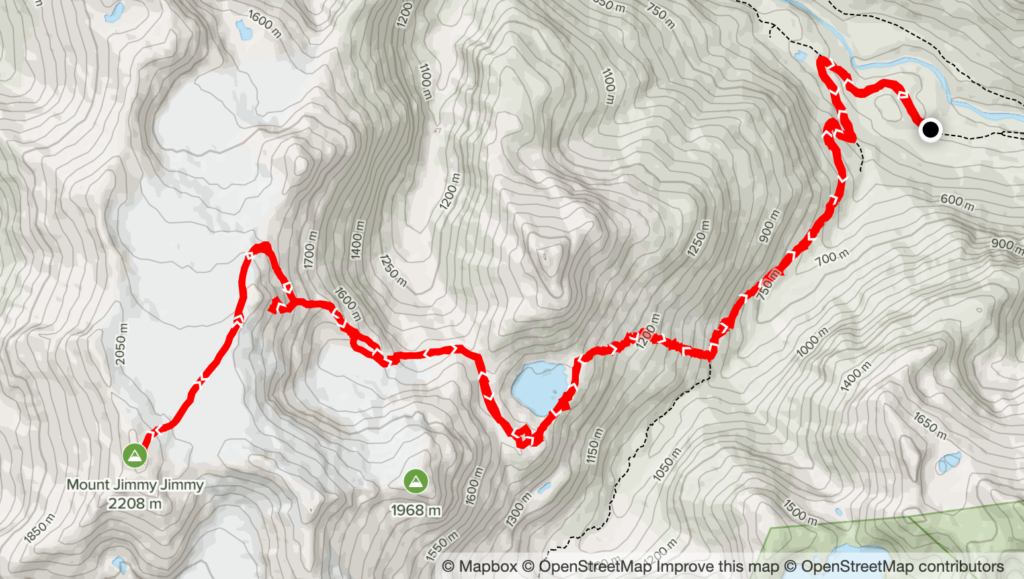
Elevation Gain: 2,292m
Distance: 27.9km
Total Time: 11 hours 52 minutes
Date: June 23rd, 2021
I saw the bulky massif of Mount Jimmy Jimmy for the first time when doing a spring ascent up Cloudburst Mountain. It immediately caught my attention, due to its expansive ice field and the glaciated terrain that wrapped around the Eastern aspect. On my return, I started to do some research and found some interesting information. The name Mt. Jimmy Jimmy originates from a chief of the Squamish nation by the same name, who laid traps in the area. It was also once a much easier area to access when there was active logging, but that has long since ceased. Despite that, it’s still fairly popular objective and I found a few good trip reports online about it from Steven Song and Patrick (BC Mtn Man). They both took this peak on in late spring/early summer when the avalanche danger was much lower. I felt it’d be more within my comfort zone to wait until early summer, due to the complex terrain that guarded the summit.
The opportunity to tackle this mountain finally came around mid-week on June 23rd. A heat wave was in full swing in BC, but it meant clear skies and a good chance to take on a number of objectives. With COVID still in play, I had all this vacation time and no where to spend it, so a day in the mountains it was! My friend and usual summit partner, Jacob, was free the 23rd as well and was on board to try Mount Jimmy Jimmy. We made a plan to leave Vancouver at 4:30am to try and beat the afternoon temperatures and be back for a reasonable time. Based on those other trip reports I knew we were in for a 10-14 hour day with around 2200m of elevation gain across 24+ km.
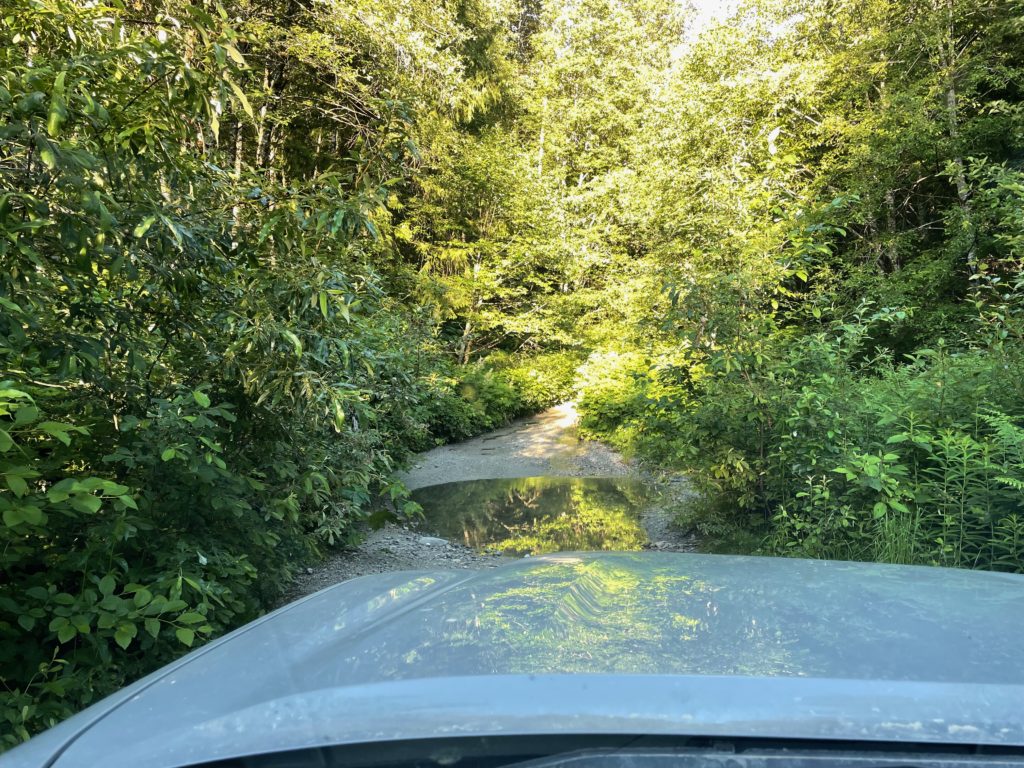
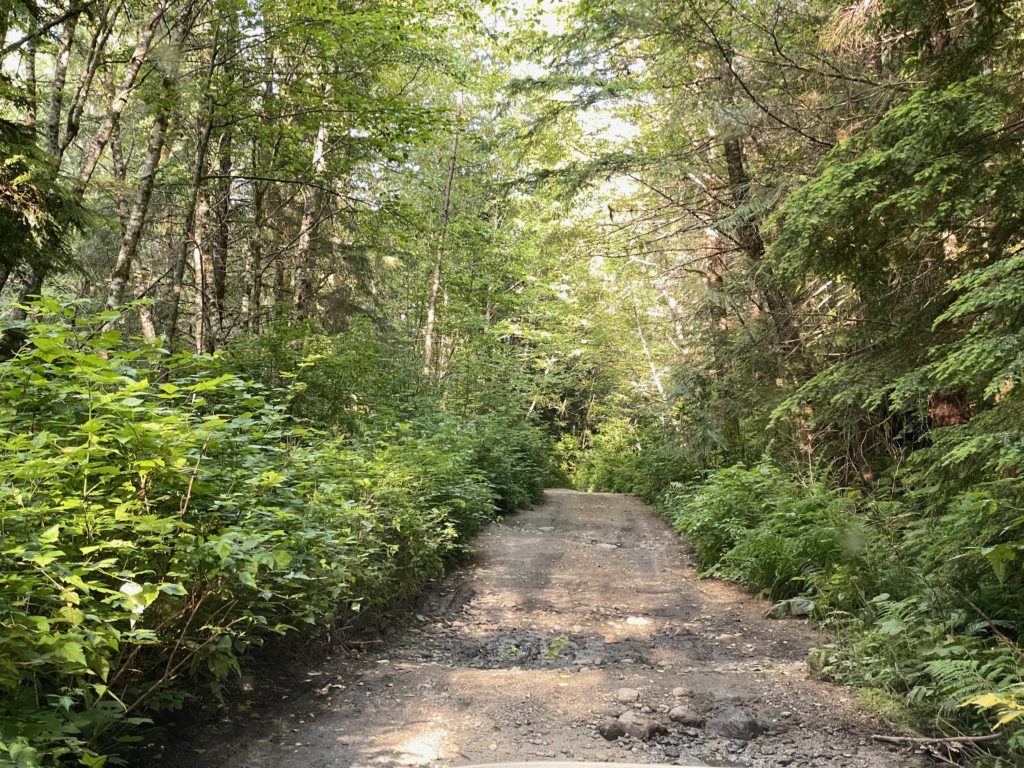
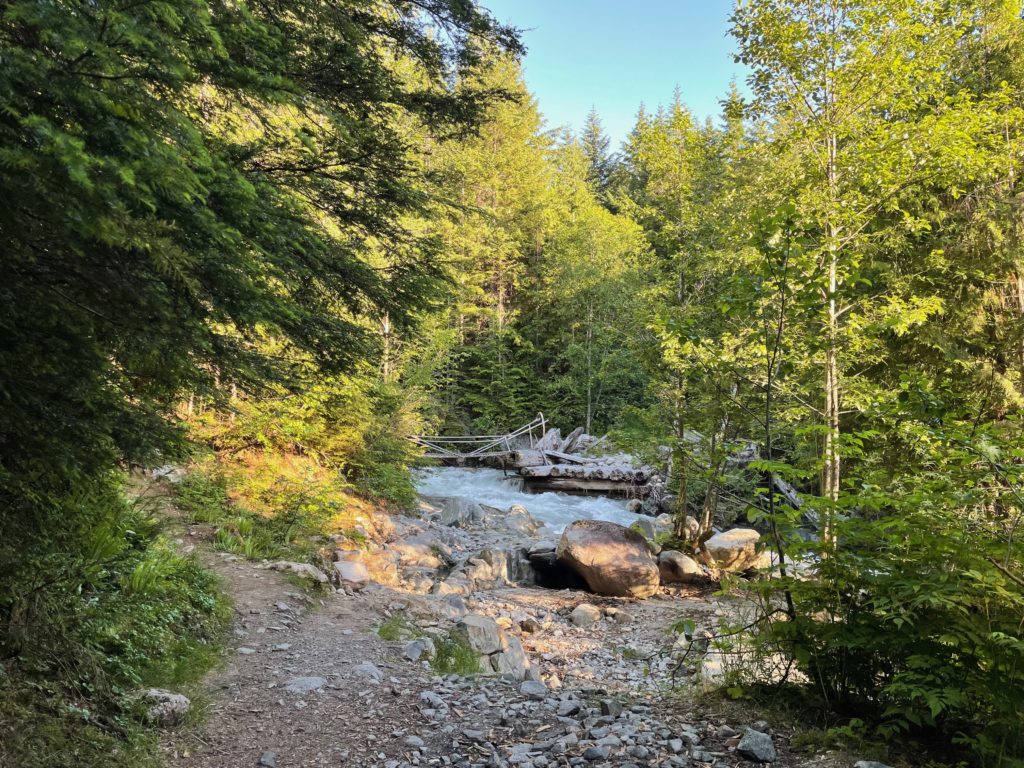
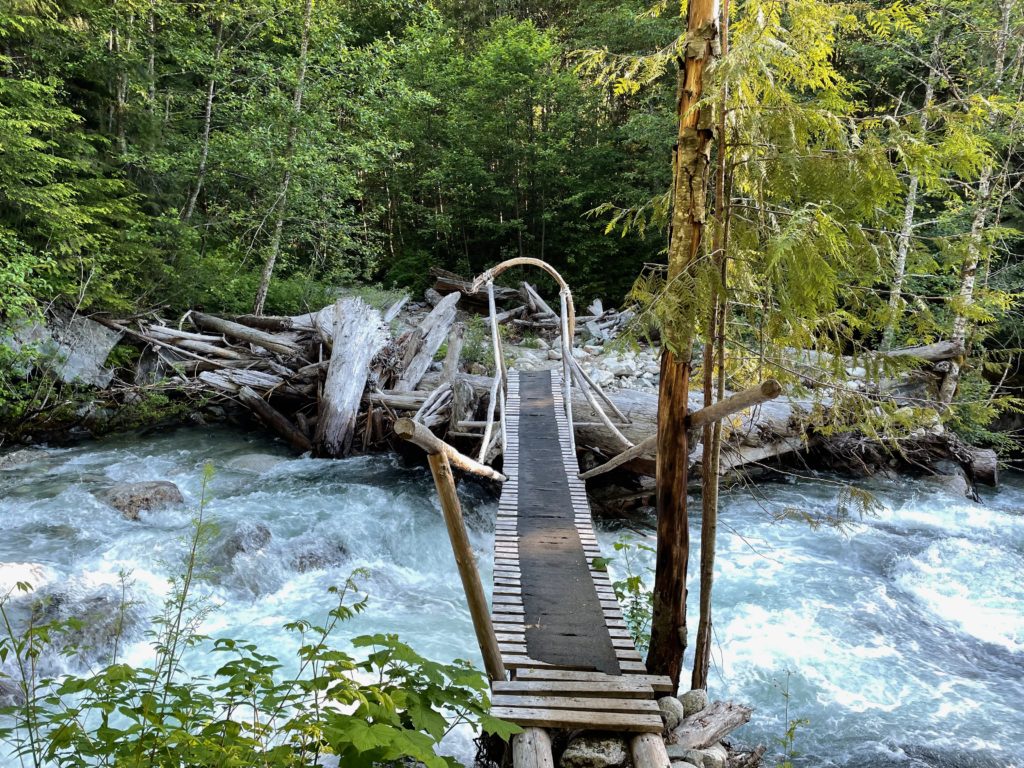
On the Wednesday, I rose up at 4am with a paltry 4.5 hours of sleep behind me and headed to East Van to pick Jacob up. We made good time to Squamish and we were on Ashlu main not too long after. The FSR was in great condition, except for the last portion of the A600 Branch, which had some minor flooding, washout and high clearance pot holes. By 7am, we were geared up and making our way across Pokosha Creek via the well engineered foot bridge. After the foot bridge, it was smooth sailing down the decommissioned portion of the A600 branch. About 1.5km later and we took a left turn down the more overgrown Pokosha Creek FSR and continued a steady climb up through the forest.
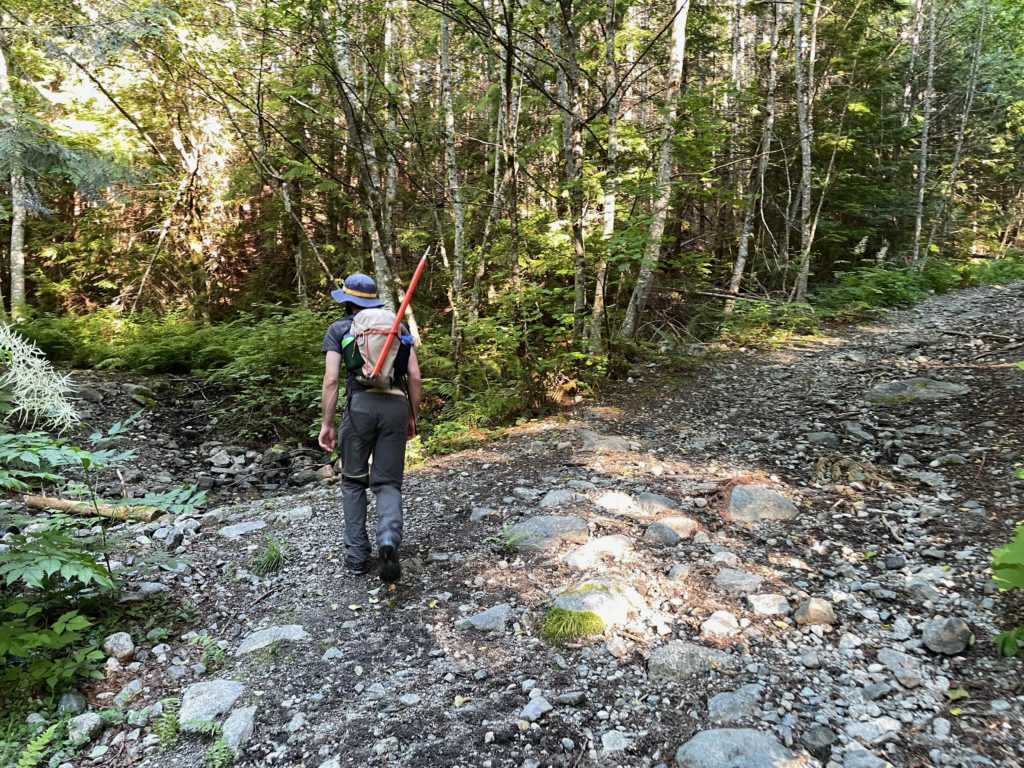
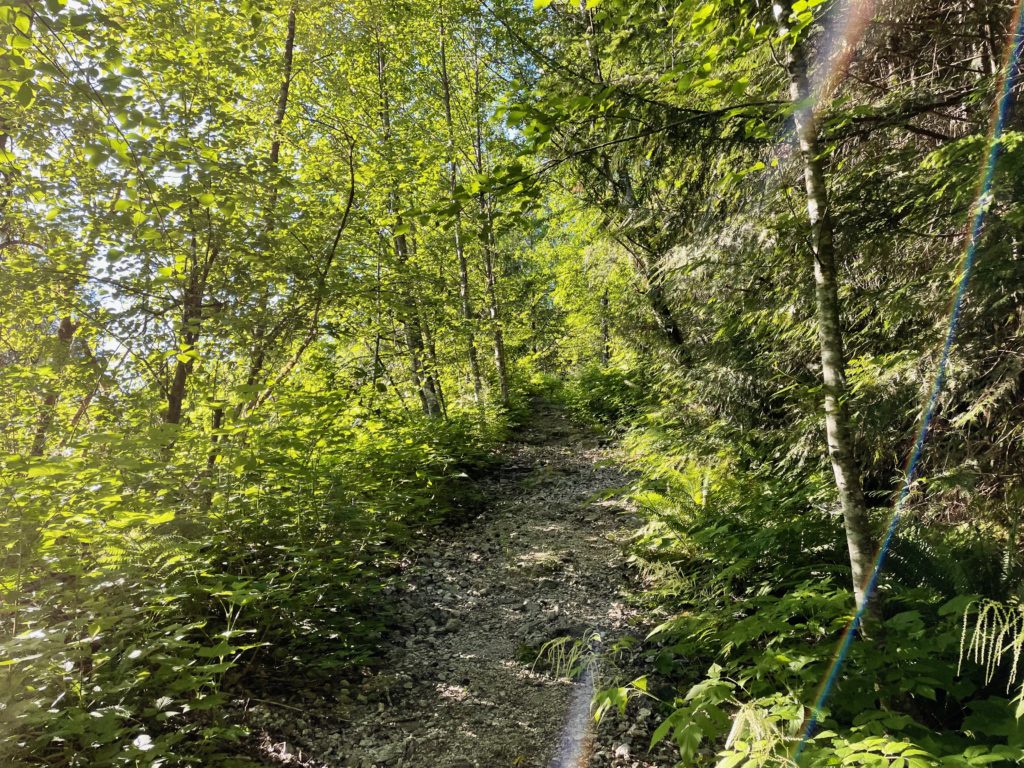
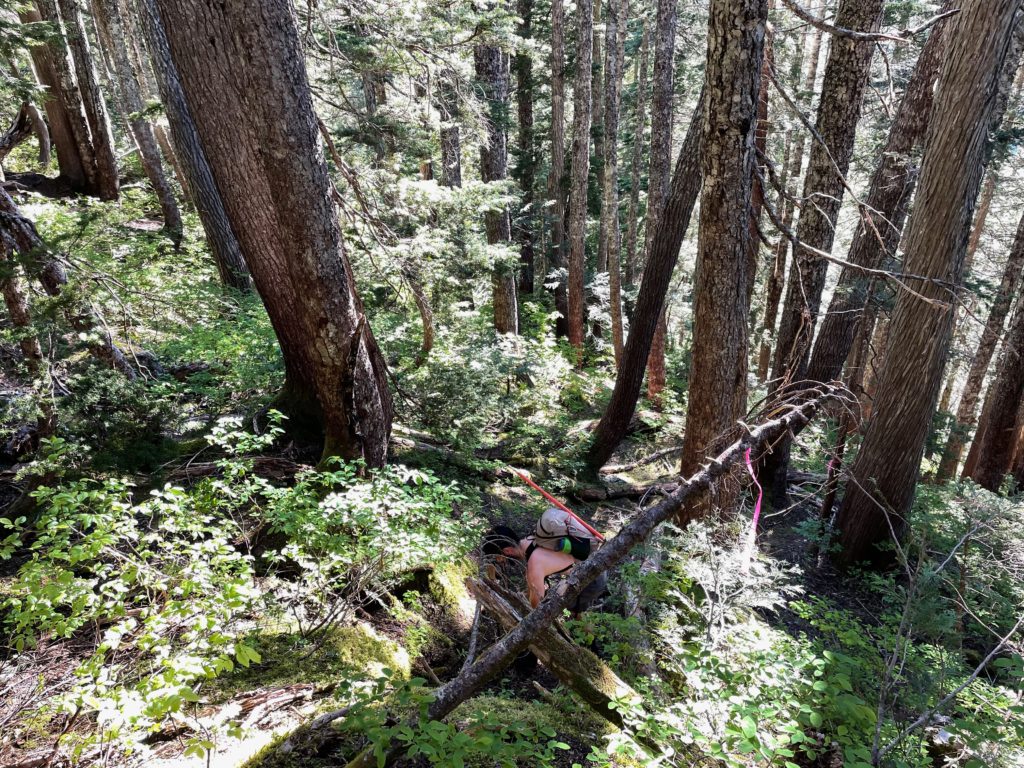
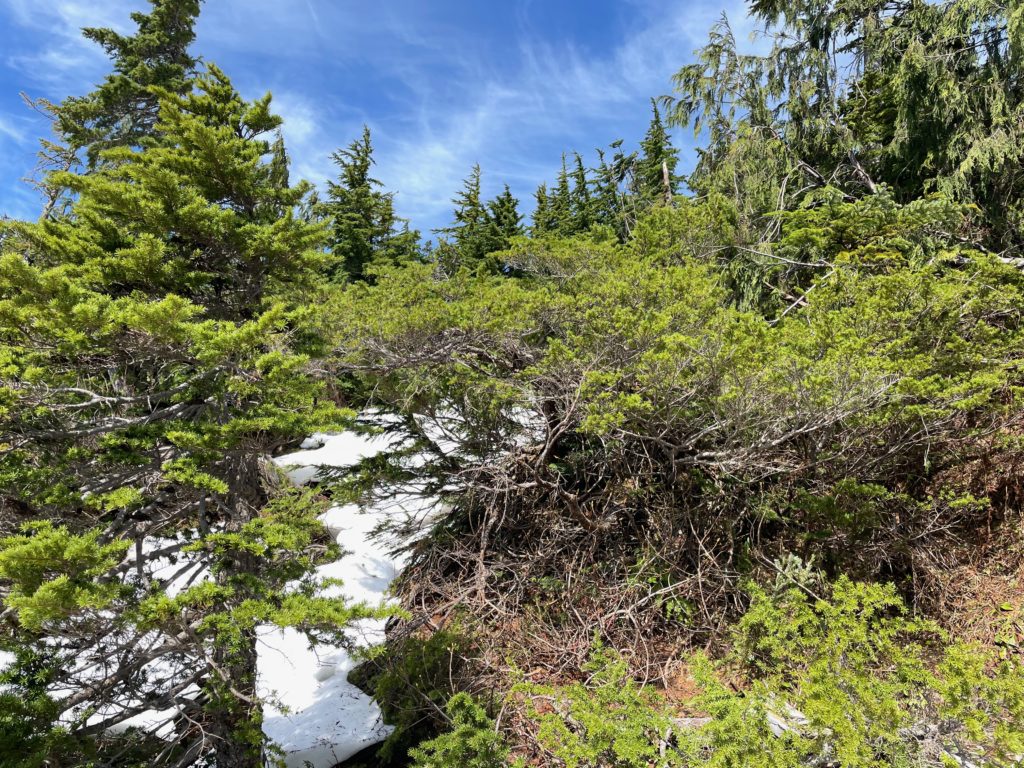
Somewhere around the 5km mark the Pokosha Creek FSR tapered out into a thin trail and then veered right straight up into the forest. From there it was a steep climb through the trees to reach Coin Lake. The lower section was generously flagged and made route finding a breeze. However, as we got closer to Coin Lake, the brush started getting significantly thicker and on multiple occasions Jacob and I found ourselves off track bush whacking through dense alders and bushes. Around 50m below Coin Lake we finally came out to an opening and the route became obvious again with an easy ascent up some open snow slopes to reach Coin Lake.
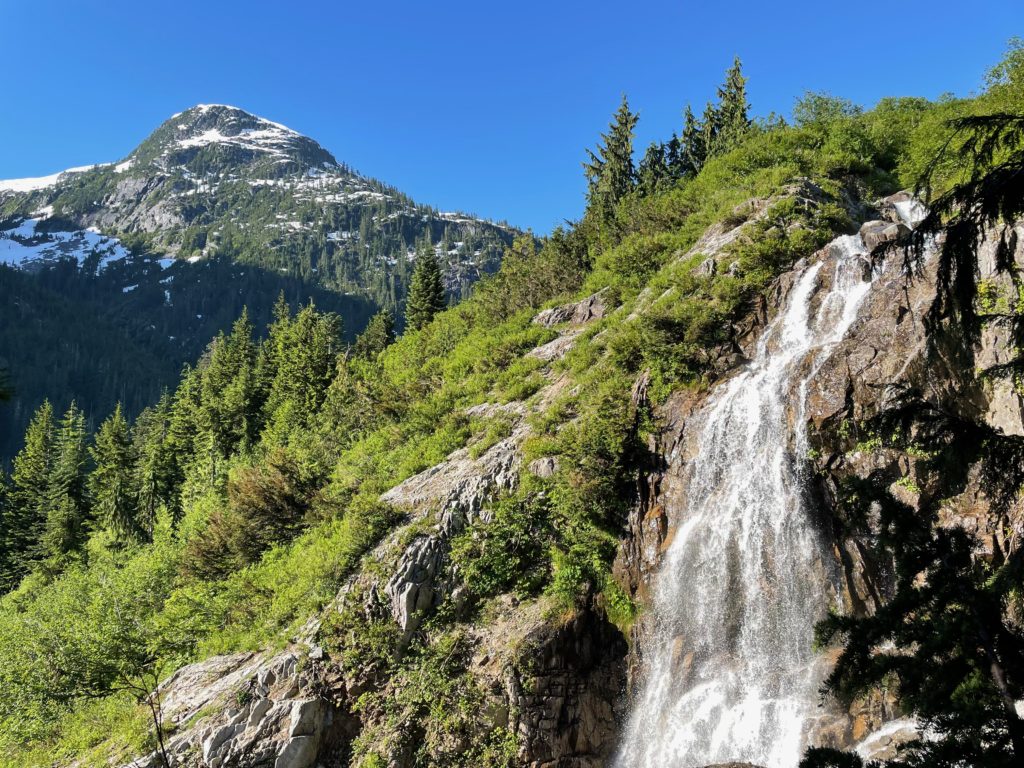


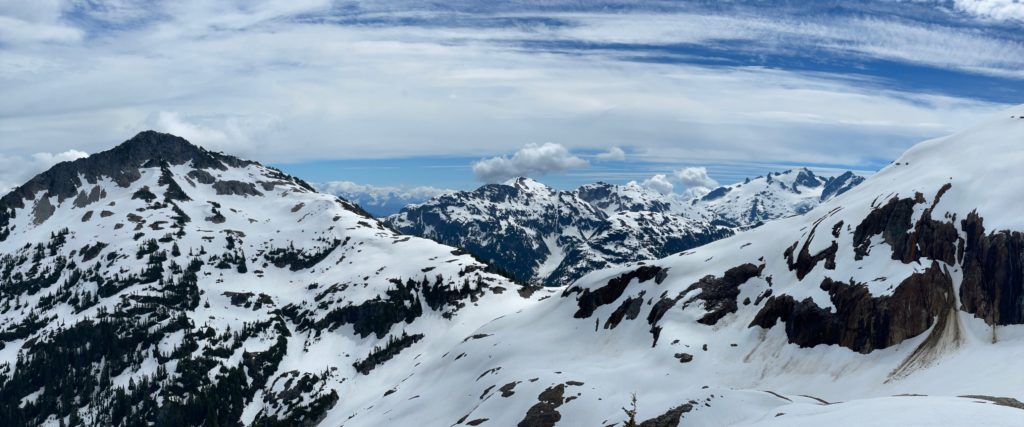
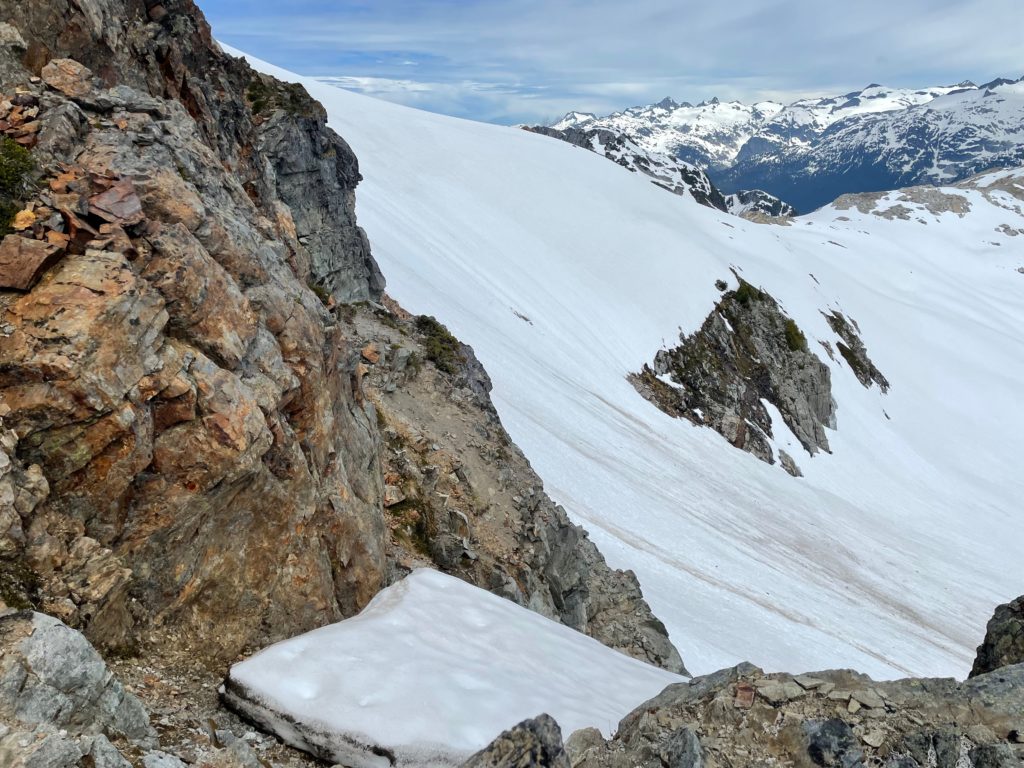
Once at Coin Lake we paused for some breakfast and then took a less direct route around the Eastern side of lake to reach Coin Pass. The terrain here was straight forward albeit with quite a few rolls up and down to finally reach the pass. The easy terrain changed as we came around the bend with Coin Mountain on our right. There we were met with a massive 3-400m wall of glaciated slopes and cliff bands. All the photos from the trip reports I’d seen hadn’t done justice to the magnitude of the terrain in my opinion. Jacob and I both felt a little over our heads, but we figured we might as well give it a shot and we could always turn around.
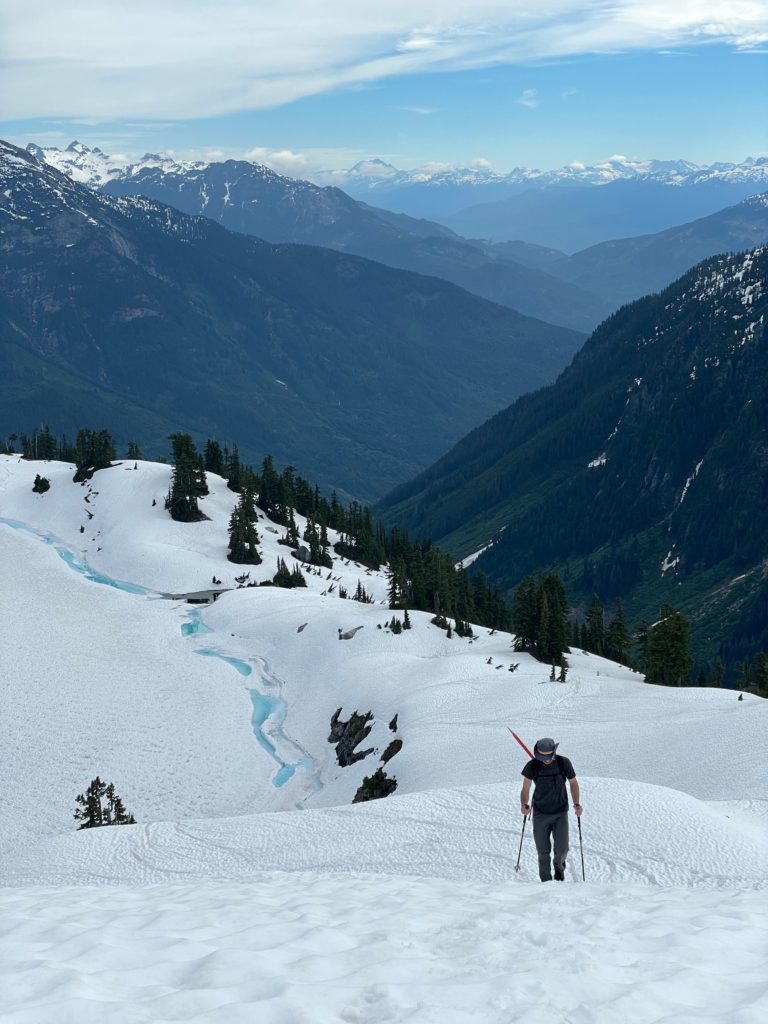
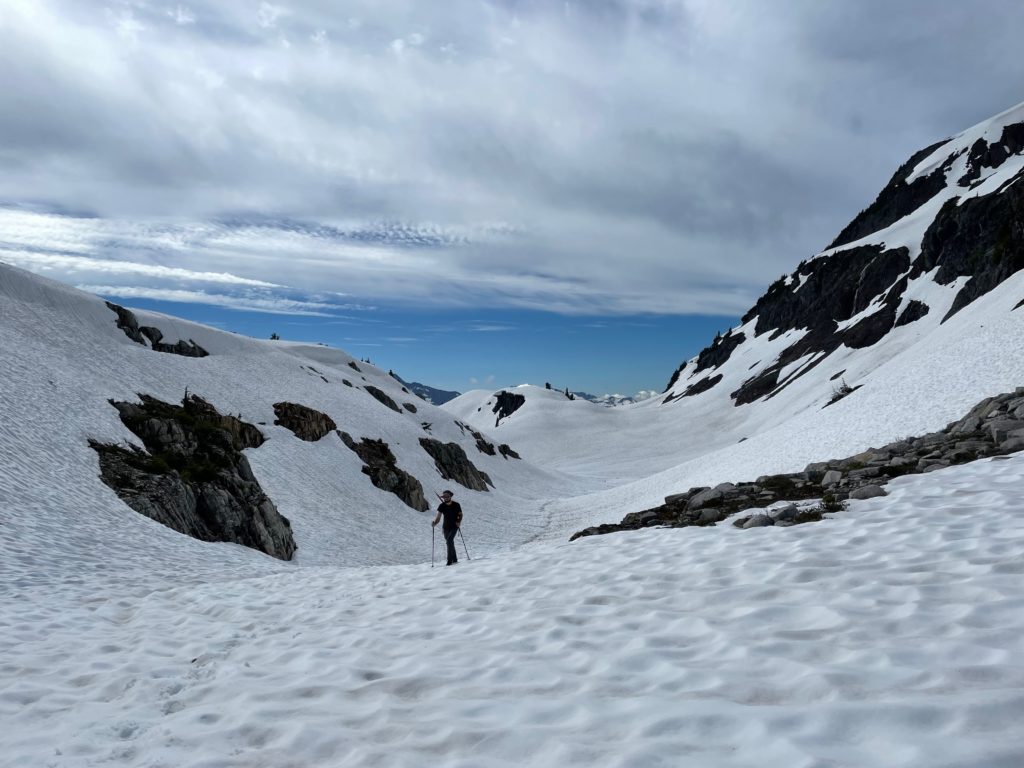
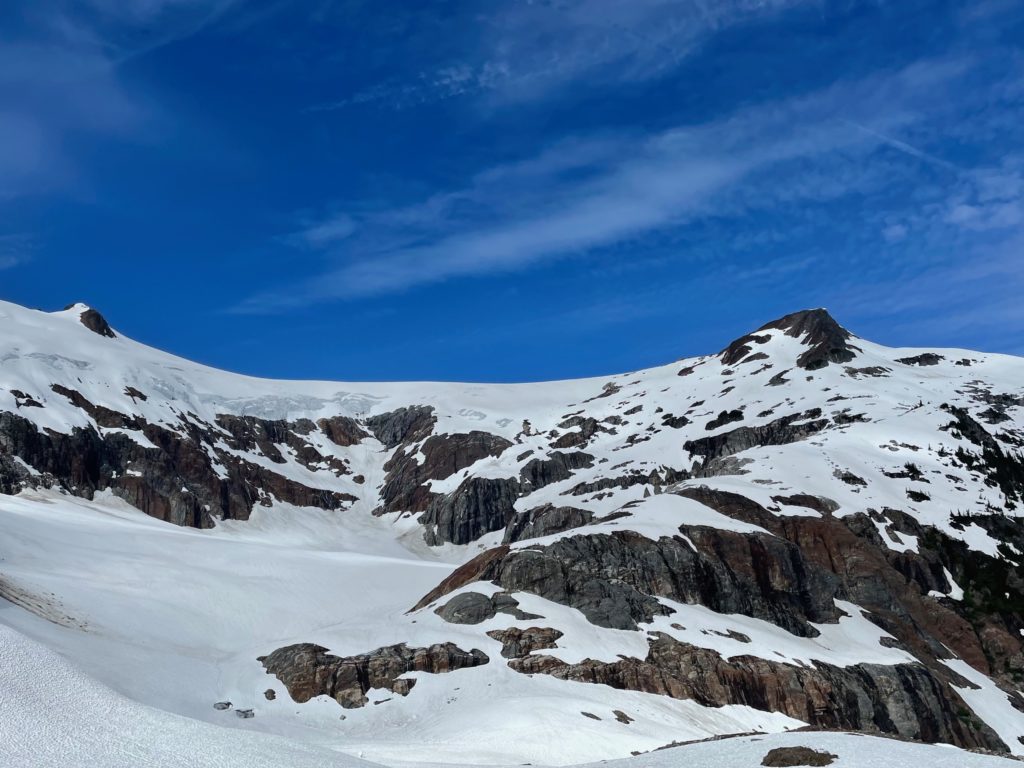
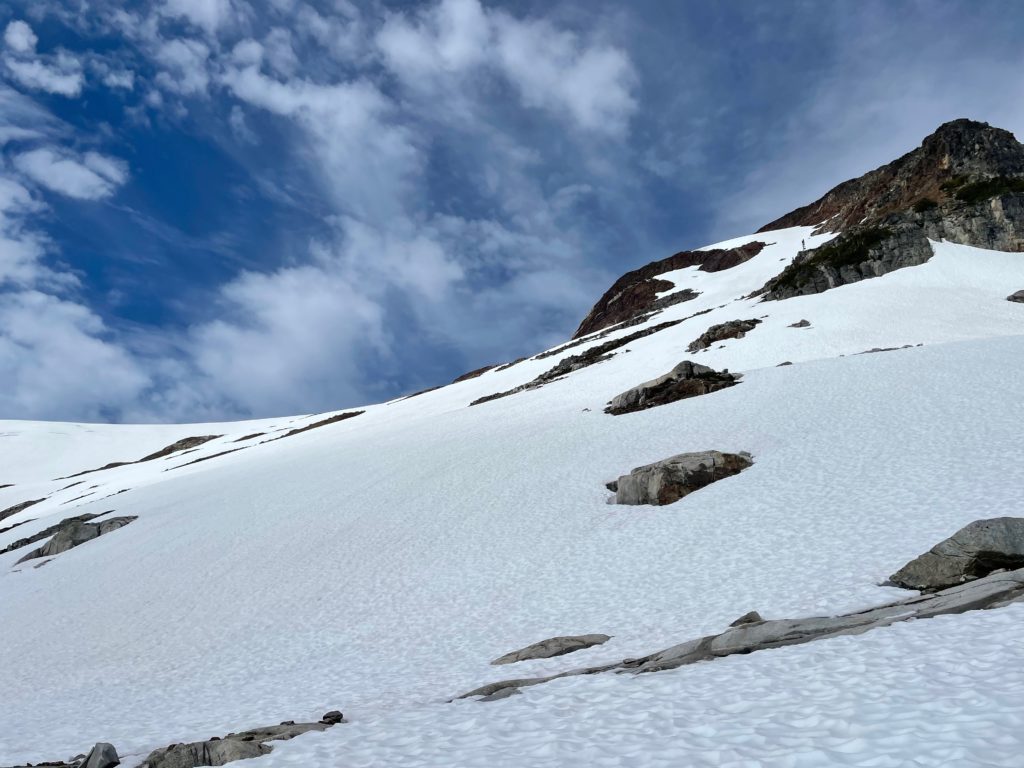
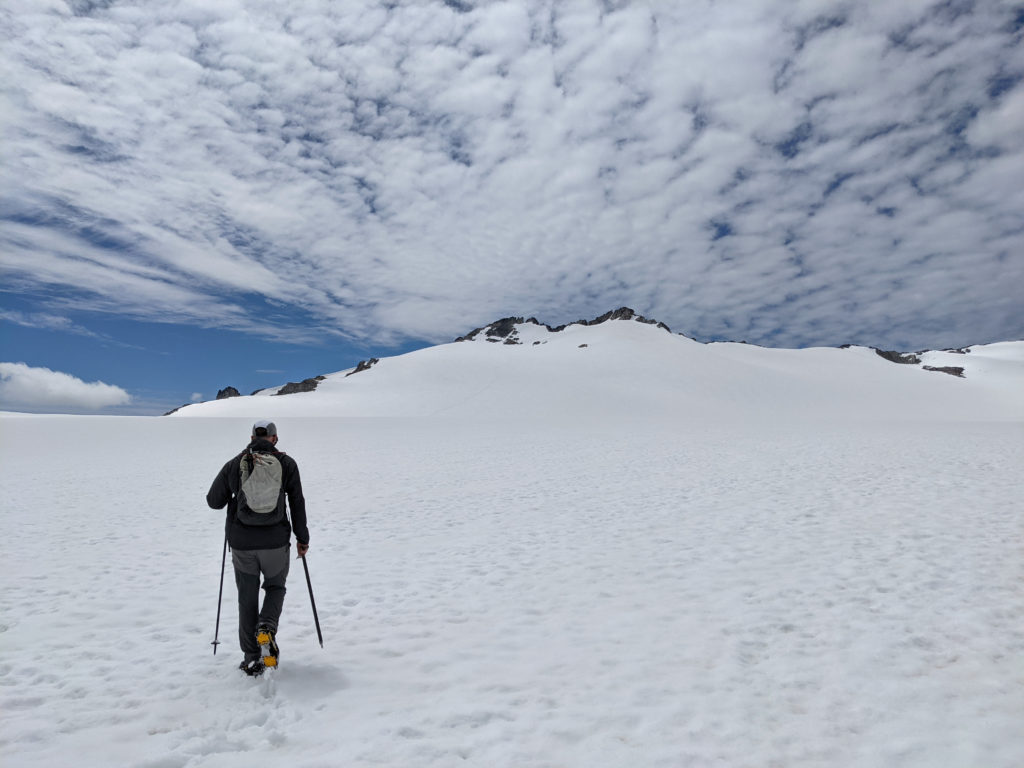
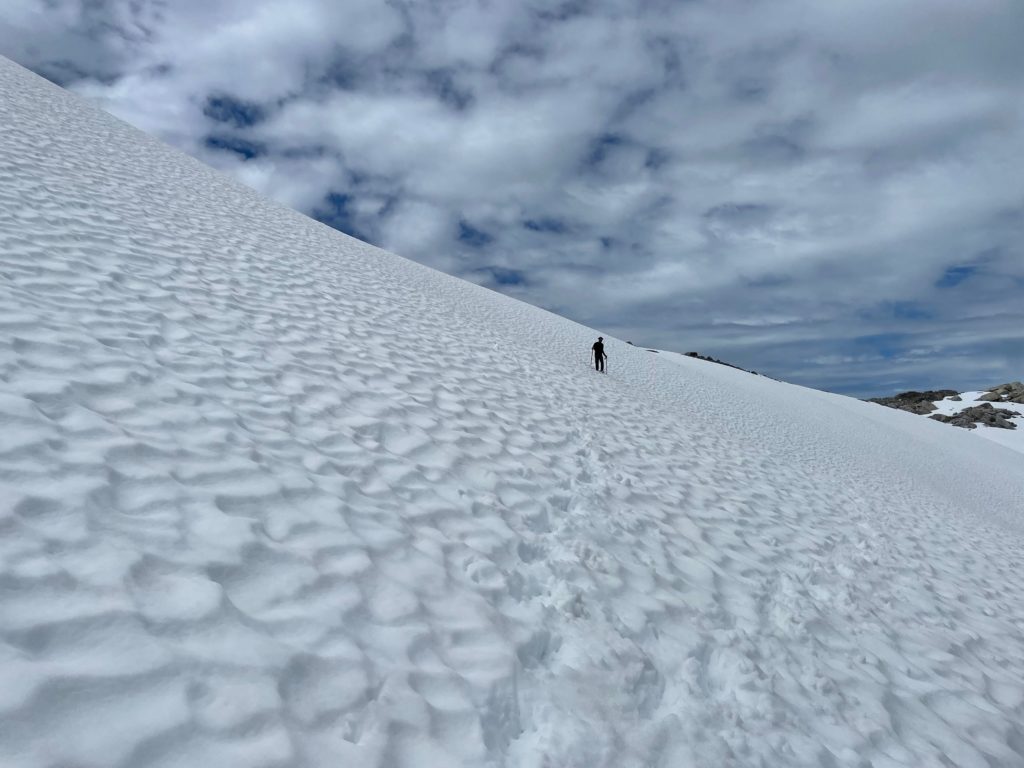
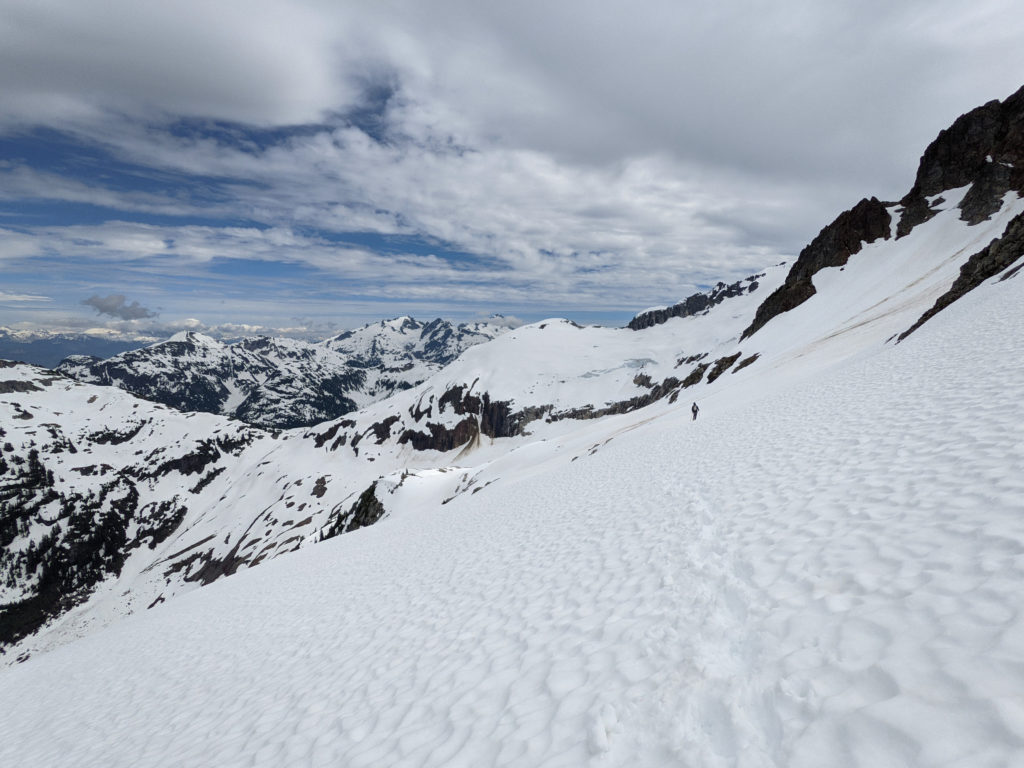
From the pass, we had to drop down into the large bowl at the bottom of the glaciated cliffs and then head up the ridge on climber’s right. Here the terrain was quite mellow with a few dry bands of rock to climb over. The ridge continued until it was directly below a large sub-summit of Mount Jimmy Jimmy. The normal route is to cut diagonally across the slope at climber’s left until you reach the top of the ice field. Here we started having some doubts as the slope steepens quite a bit and a slip would result in a long fall over high consequence terrain.
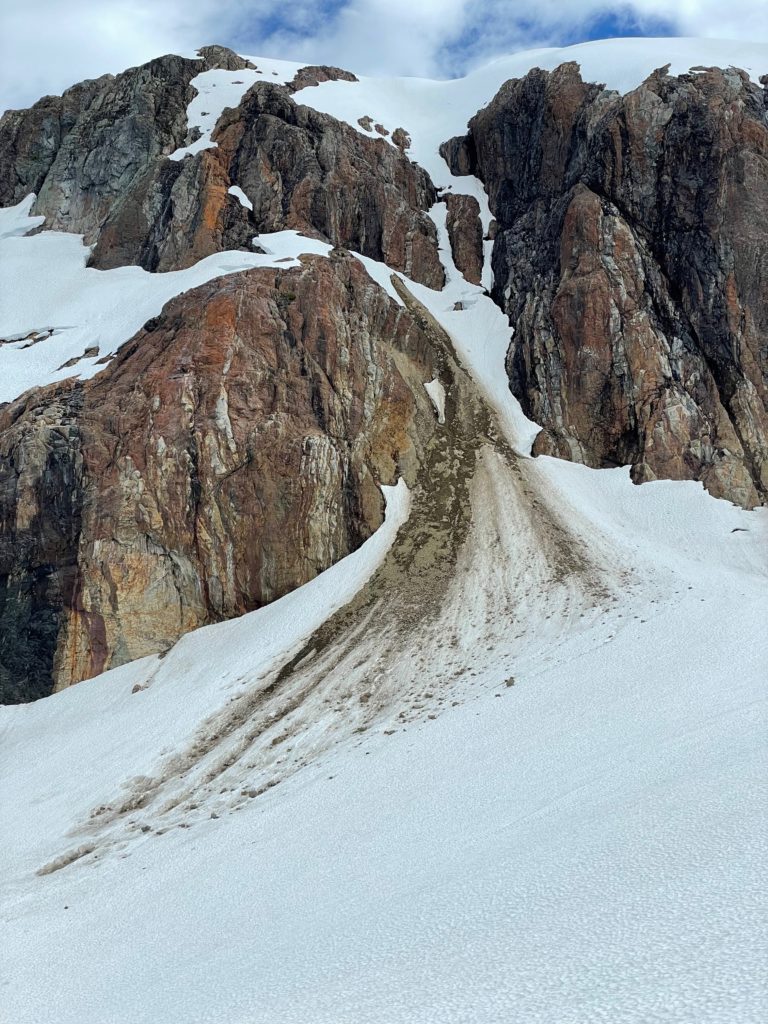
I spotted a line that would enable us to hop from one dry rock patch to the next, avoiding too much exposure and so we started our attempt with that strategy. As we went rock patch to rock patch I started to grow more concerned about the softening snow. By now it was around 11am and the temperatures were already very high. I knew we could make it up without issue, but I lacked the experience to gauge whether we could safely descend 2-3 hours later on the return. So, less than 100m below the ice field near the steepest pitch, we resigned from our attempt and started our way back.
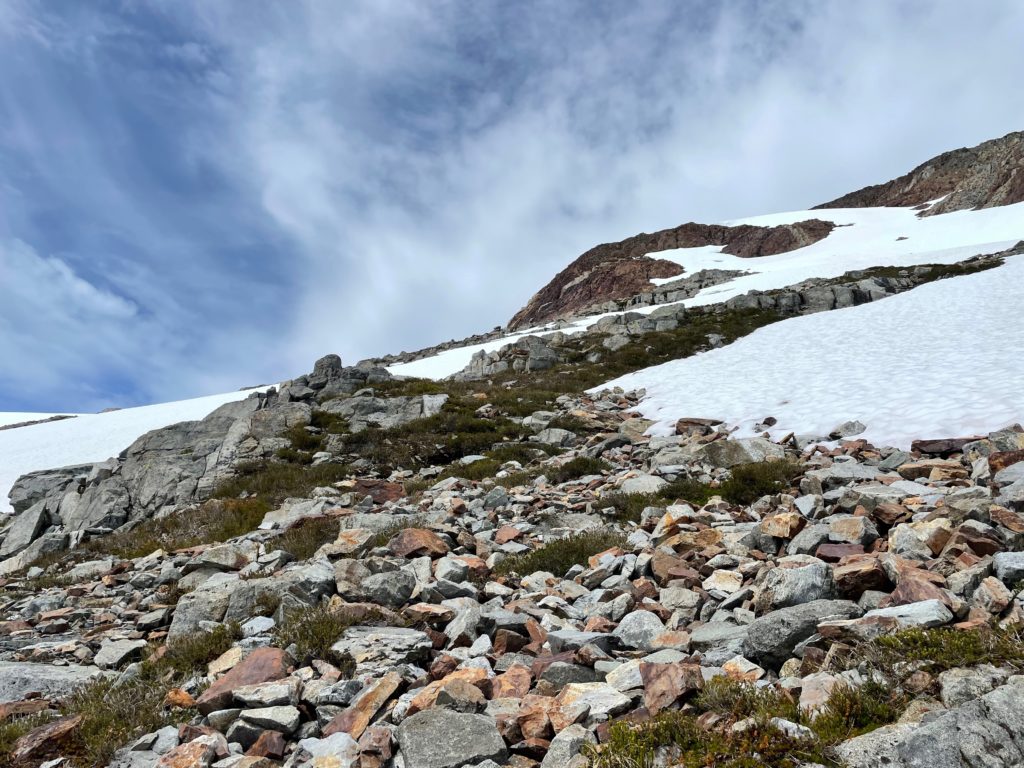
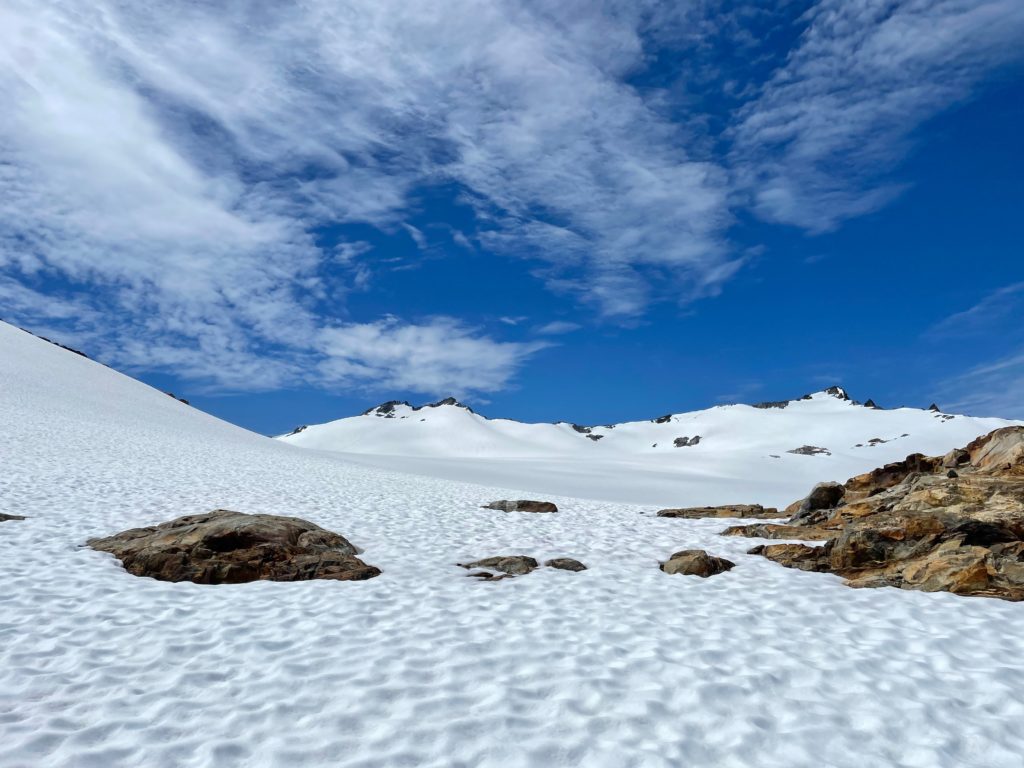
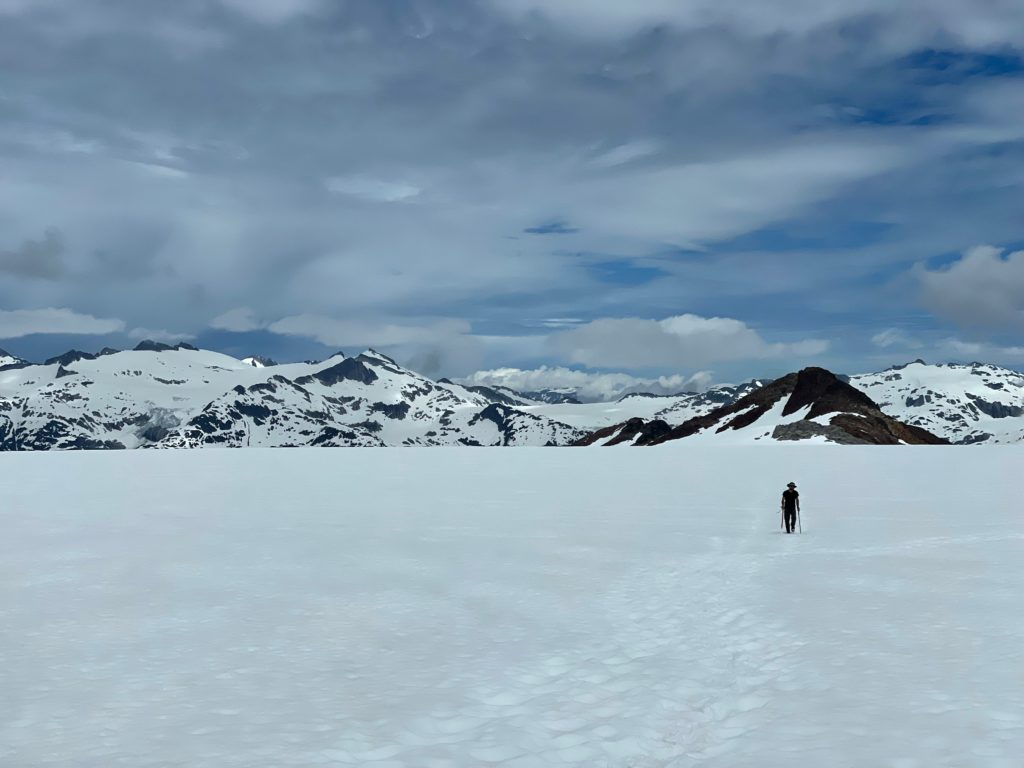
Not one to give up so close to the top, I started looking for alternative routes. Most of the sub summit we had bypassed on the way up was dry rock and so I figured it was worth checking out to see if there was another way up to the ice field. I did a short scramble to the ridge and was met with a large cliff on the other side. There wasn’t a direct way from the sub-summit, but I did spot a line that could work if we descended below the sub-summit again and went climber’s right. I kept it to myself while Jacob and I continued our descent. When we reached the mellow ridge, I revealed the new idea to him and he was open to give it a try. This time we walked with more confidence on a less steep route cutting diagonally across the slope and finally reached the ice field. We were still a bit uncertain how the snow would be on the way back, but at least it was a tamer slope angle to contend with.
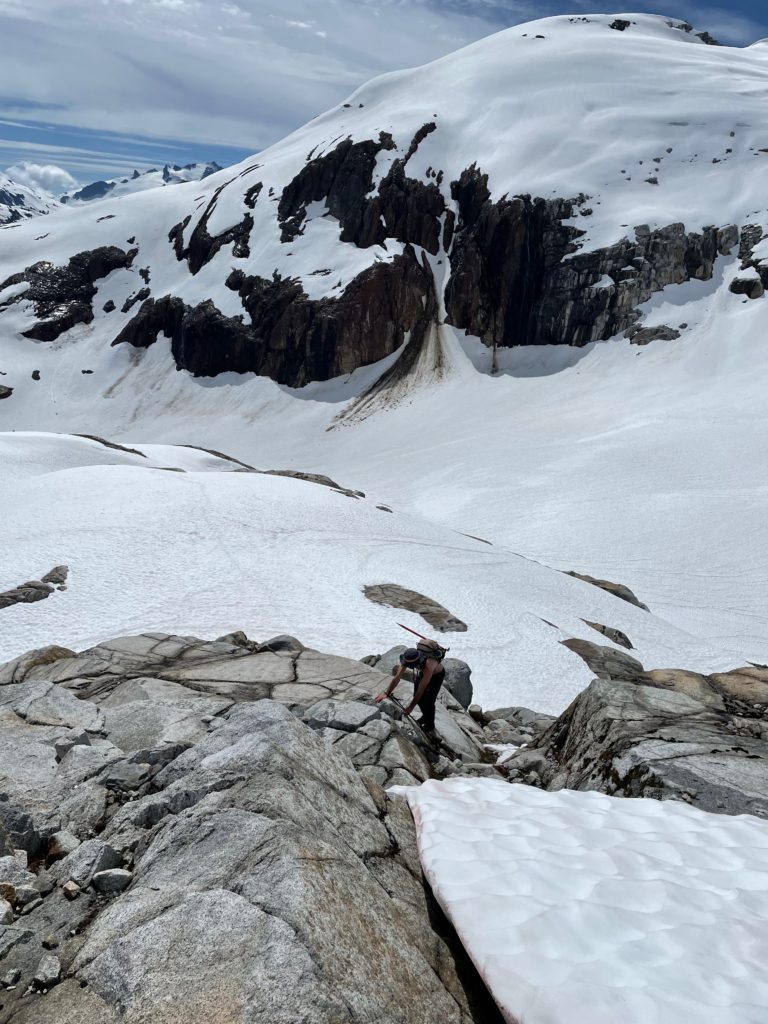
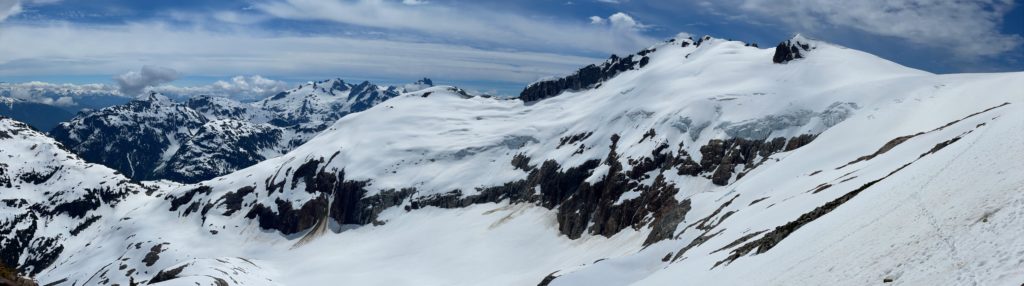
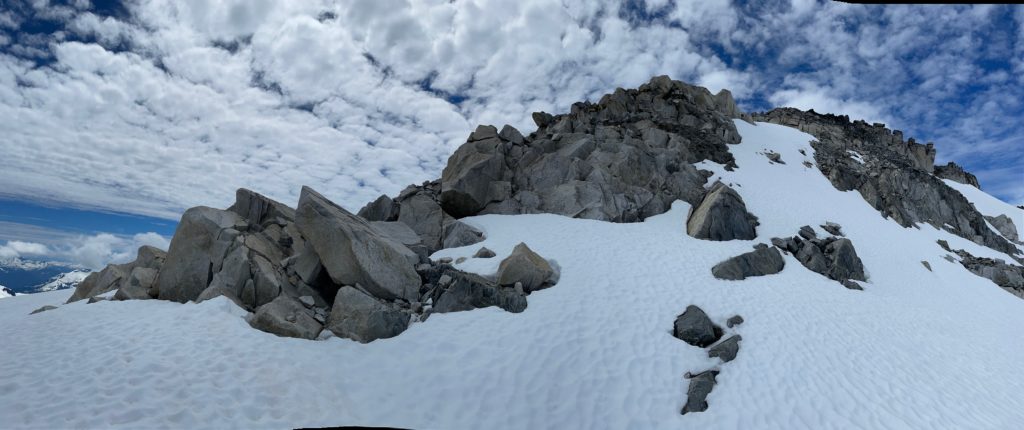
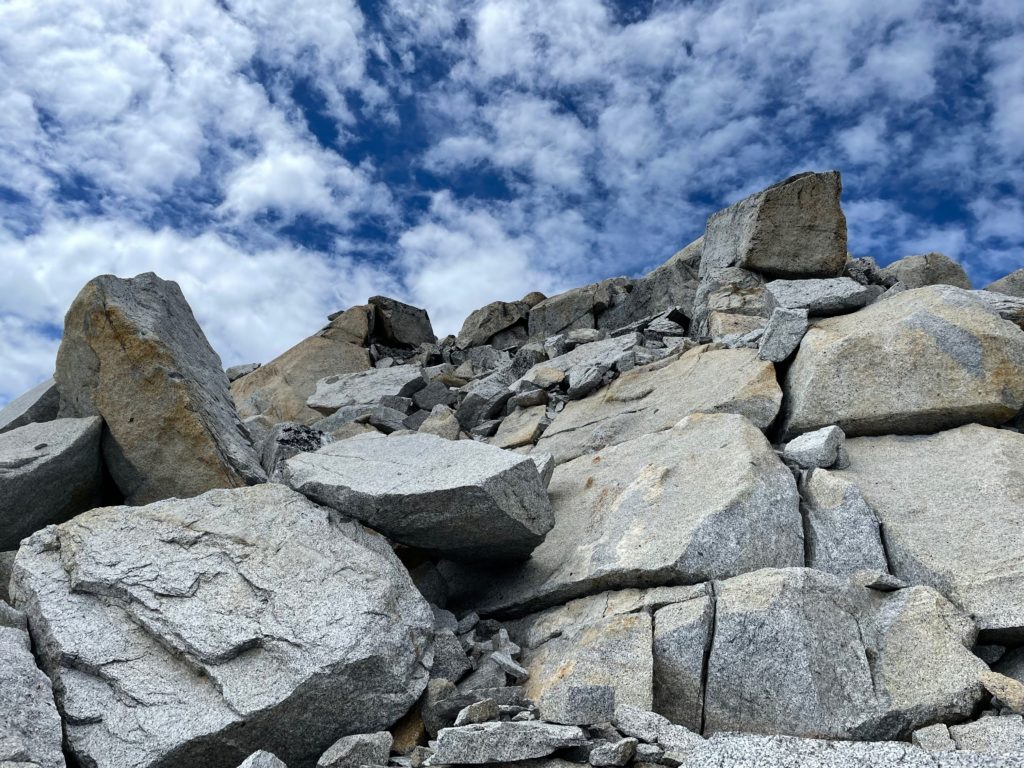
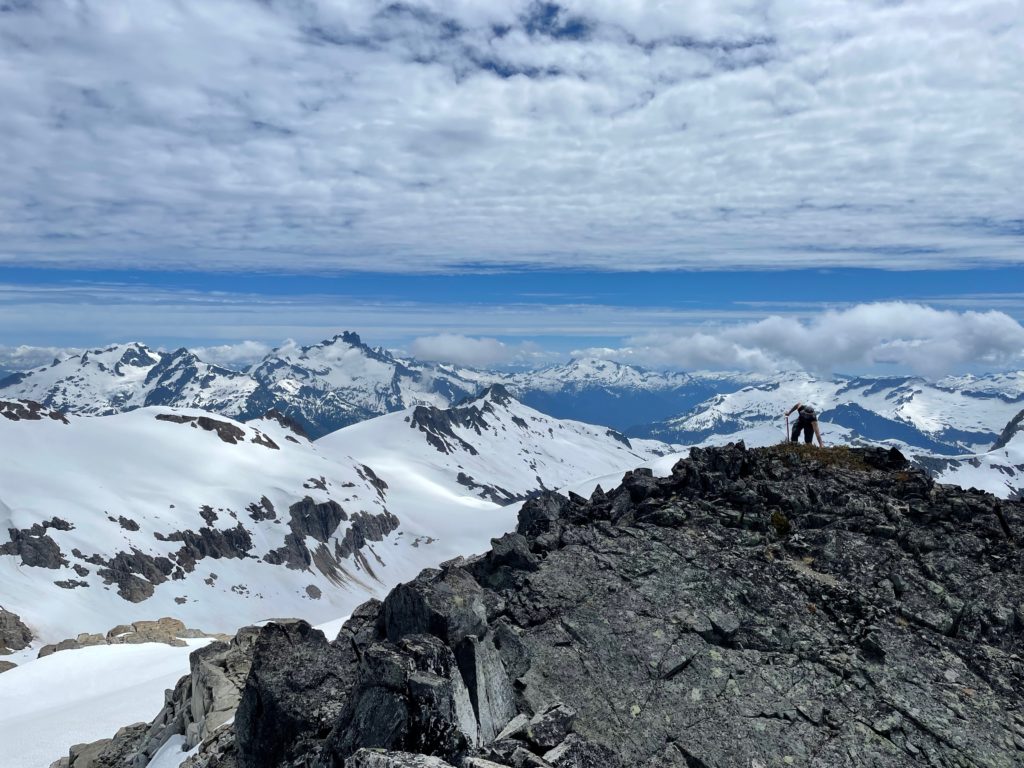
Unfortunately, this new route spit us out further from the summit, but it wouldn’t be too much to our detriment. All that stood between us and the final summit slope was a long flat ice field. The snow was firm enough that we were able to set a fast pace, sticking to the edge until we had to cross to reach the pinnacle. As we reached the final pitch, we saw some existing tracks and opted to take those up to the rocky outcropping of the summit. We ditched our cramp ons below the scramble section and then started our way up the boulder field. It was easy going, with some class 2 scrambling at most and a bit of exposure near the top. Perhaps 5-7 minutes from the beginning and we now stood on the summit cairns.
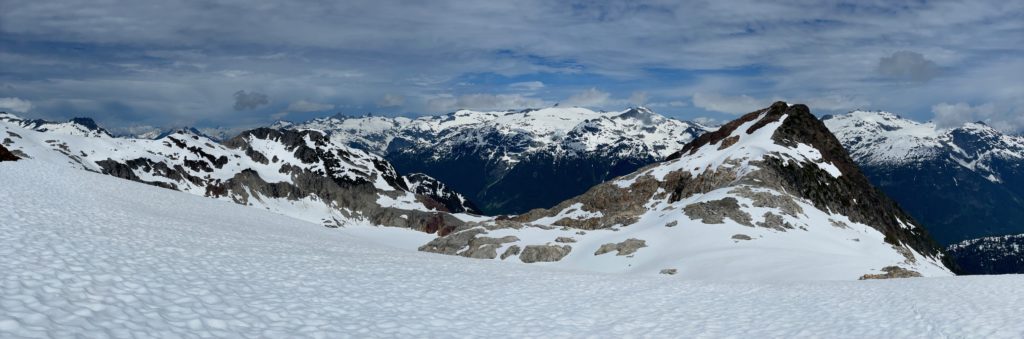
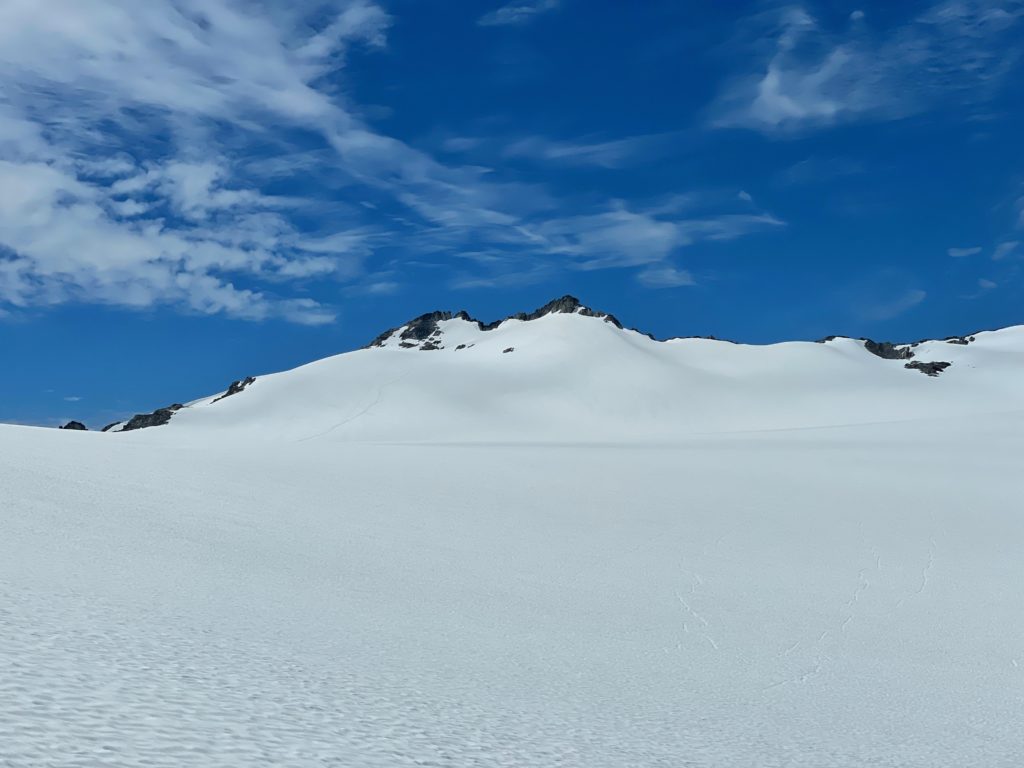
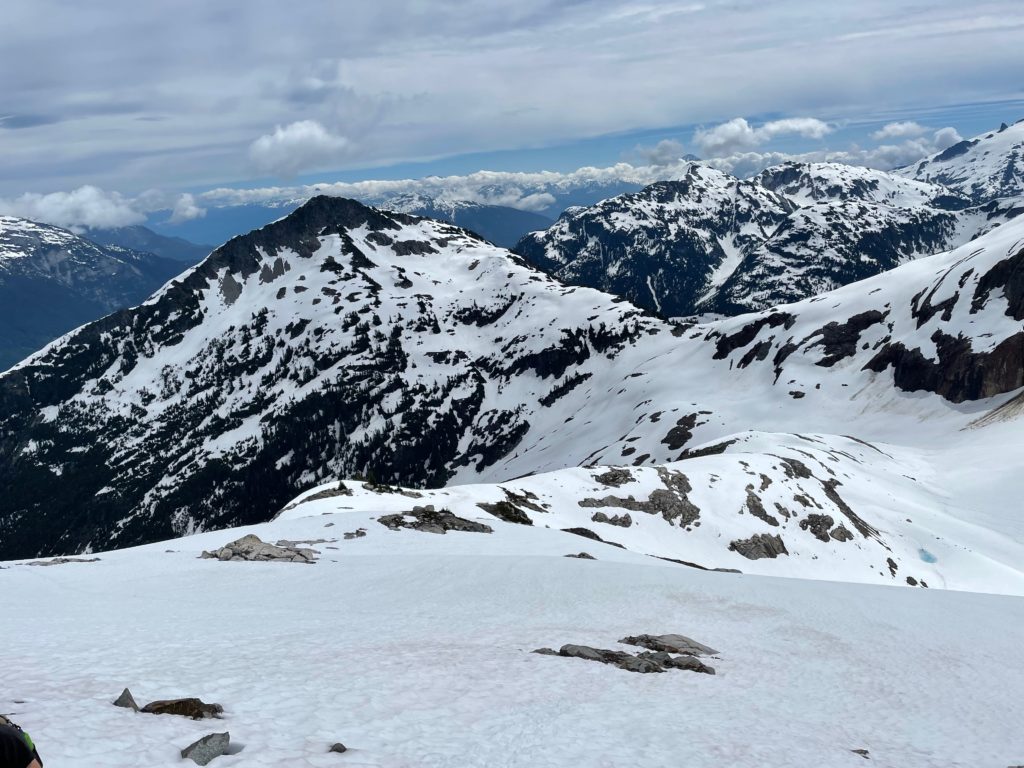
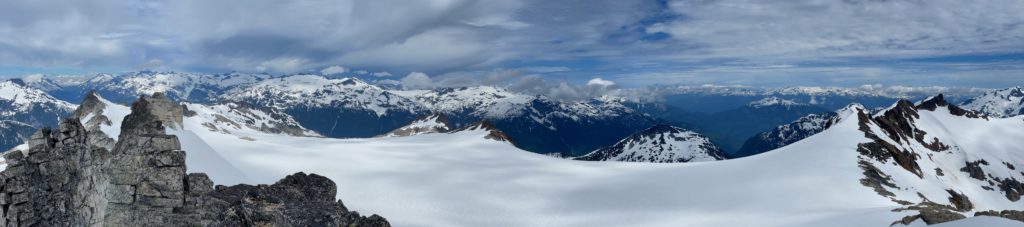
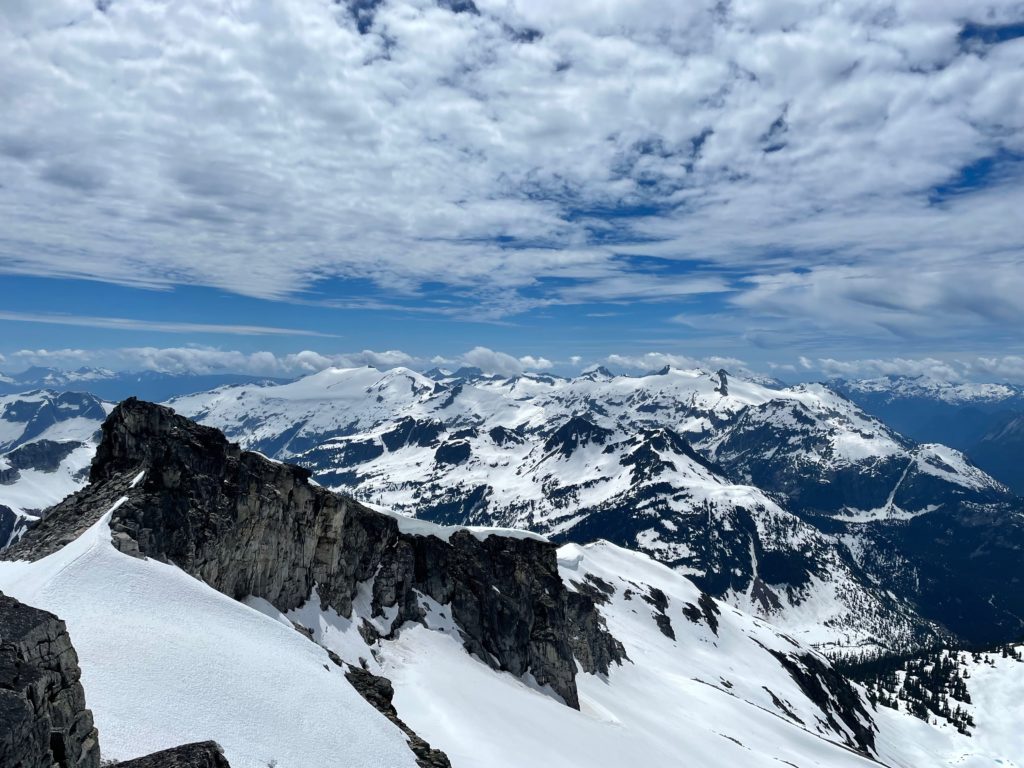
At the top we had impressive views all around. There were many first sightings for me as a number of these mountains aren’t easily visible from the Sea 2 Sky. It was truly a remote feeling peak, if not for the cell service we could still get at the top. Jacob and I took a few shots of each other on the summit and headed back down the scramble section. It was getting close to peak heat of the day, but some clouds had rolled in so we were hoping the snow melt would slow down a bit. At the bottom of the rock section, we donned our cramp ons again and then made the long plod back towards the tamer slope. We continued on a good pace and made it to the edge of the ice field and decent time. Without much hesitation we started our way down to the connecting ridge cutting diagonally across the slope again. Thankfully, the snow hadn’t actually degraded any further despite the continuous warming. We made it to safe ground in short time and then began the long plod back to Coin Lake.

At Coin Lake we paused again to dip our heads in the water and fill up on snacks. After 20 minutes or so hanging out in the sun and getting cooled of, we reluctantly left to retrace our steps through the awful bush whacking section. Coming down was a bit easier as we were able to locate more flags and soon enough we were back in the open forest following a more obvious patch. From there it was just auto-pilot mode back to the truck with all of the route finding out of the way.
We made it back for roughly 5pm and that concluded the biggest trip of the year for me so far. All said it was ~12 hours total trip duration, ~28km distance and ~2200m of elevation gain. Mount Jimmy Jimmy was a very impressive peak thanks to the glacial ampitheater below the ice field and the remote feeling. I would not be surprised if a hike up the a bowl does not gain popularity over the years as it’s truly impressive and not everyone is up for traveling across high consequence terrain.