
Elevation Gain: 1,499m
Distance: 11.54km
Total Time: 9 hours 5 minutes
Date: August 9th, 2021
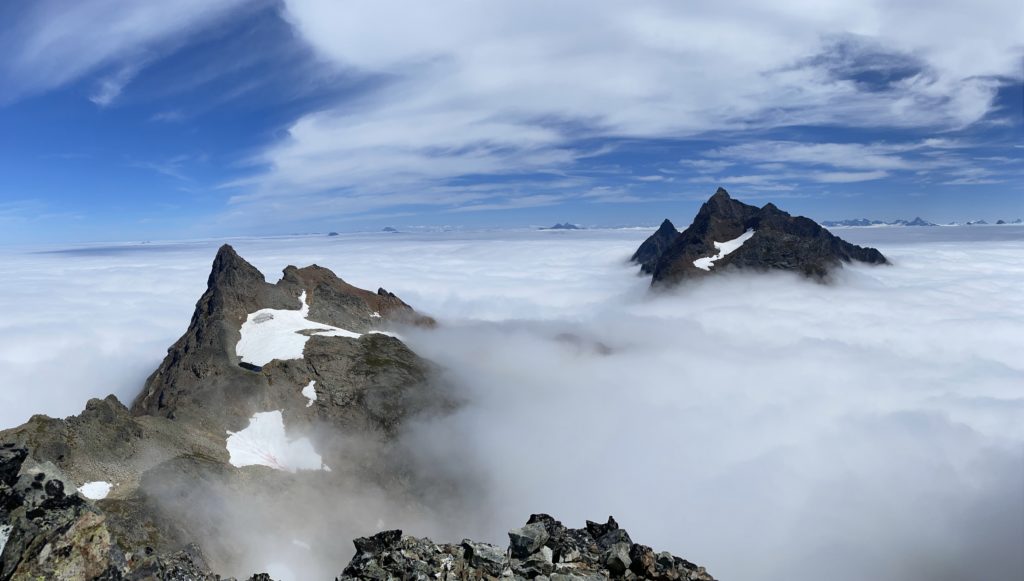
Baby Munday is a 2250m peak located in the Cheam Range near Chilliwack and is considered the most technical route amongst its neighbors. It’s the only peak of the group that requires exposed 5th class moves to gain the summit and for that reason it’s not often ascended; requiring climbing gear to safely reach the top. The peak itself is comprised of 3 separate towers with a north, central and south summit. The route outlined in Matt Gunn’s book only takes you to the north tower, which is the lowest summit. About 3 weeks ago, I made an uninformed attempt at Baby Munday, loosely following the details in Matt Gunn’s book. We made it to the north summit, discovered it was the lowest of the three and then made an attempt at the south summit before realizing it was too technical to scramble.
After all that work to reach a lower summit, I was determined to come back to get the true summit. However, I lacked the rope and leading skills to get through the technical pitches. I left a small comment about my desire to get the south summit on the SWBC Peak Bagger group and ended up having a discussion with Steven Song about setting something up in the future. I didn’t have to wait long however, and only 3 weeks after my first attempt, Steven reached out about doing the south summit and potentially Knight Peak on the Monday. I couldn’t pass the opportunity up, so booked the Monday off and we agreed to meet up in Abbotsford for 6:30am before continuing up to the trail head in my truck.
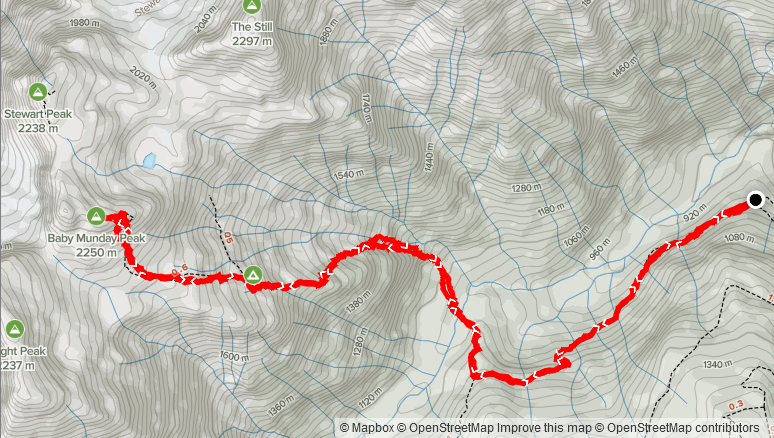
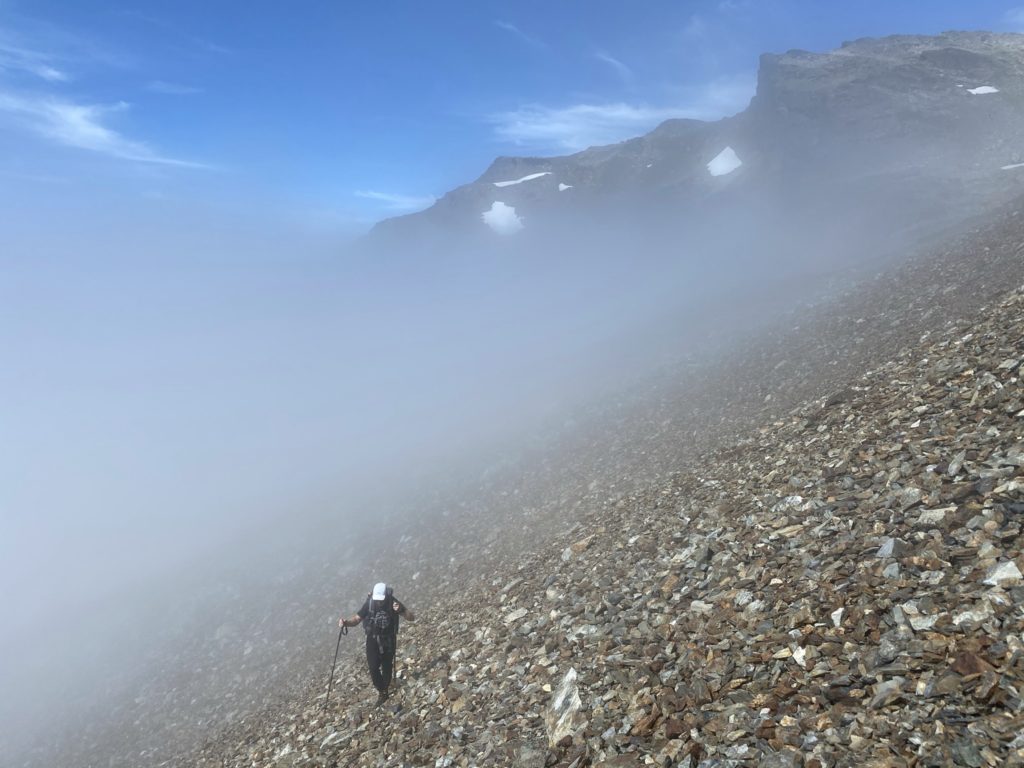
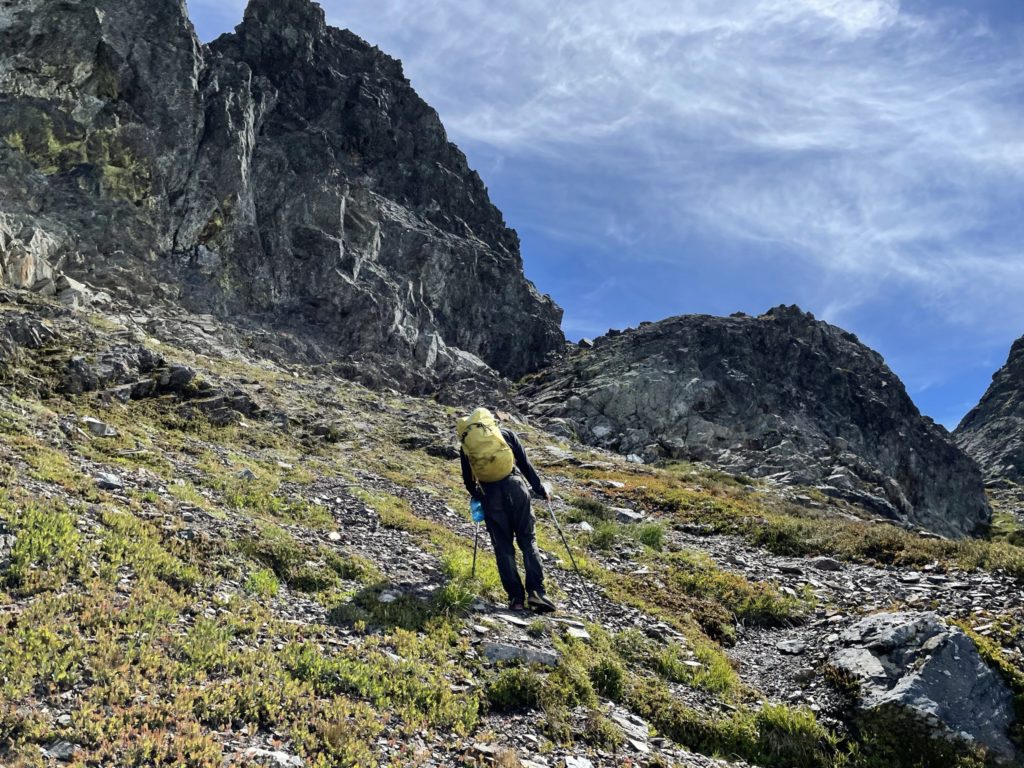
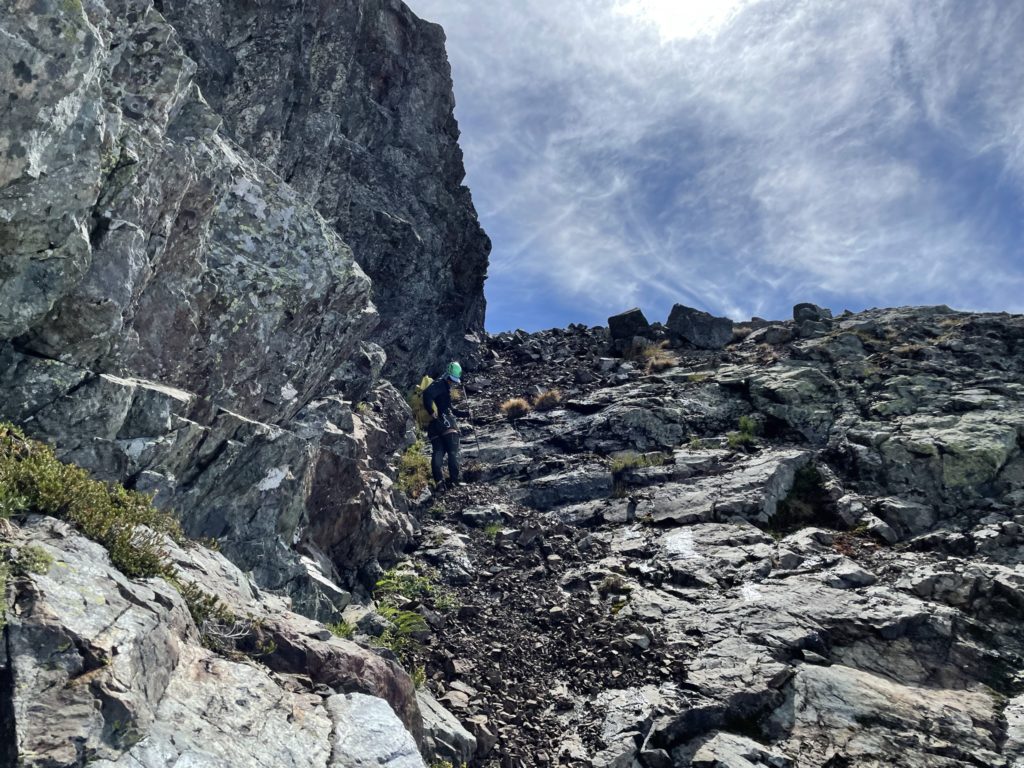
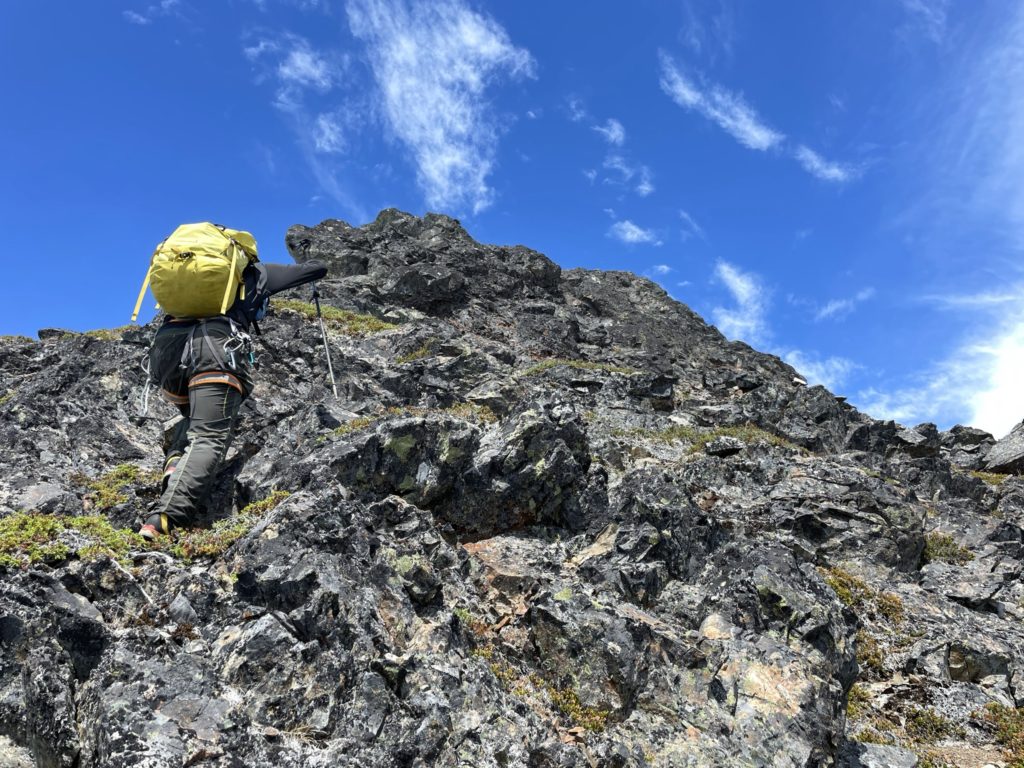
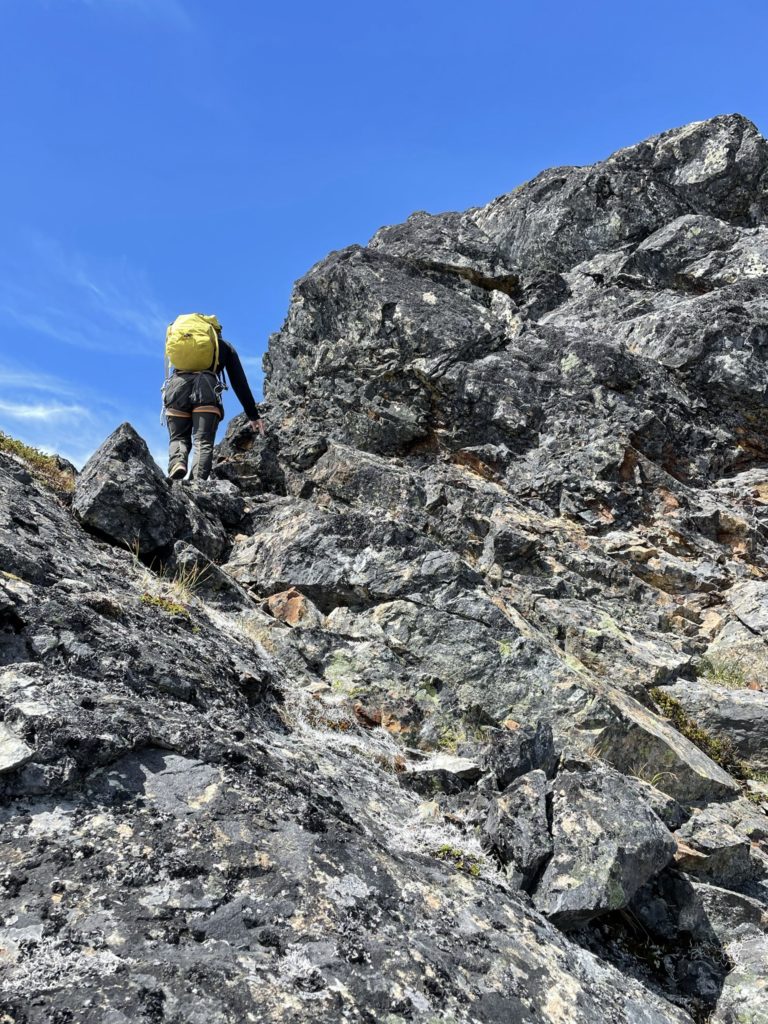
On the Monday, I arrived a few minutes after 6:30am and met Steven at the A&W for a bit of food. By 7:50am or so, we were turning onto the Foley Creek FSR and then the rather rough Airplane Creek FSR. We arrived at the trail head about 40 minutes later and got our packs ready. The forecast was originally calling for sunny with a mix of clouds, but on our arrival the entire valley was shrouded in a solid cloud layer. Not to be stopped by clouds, we were ready to go and on the trail by 8:38am and heading down the water soaked bushy trail to Baby Munday. The approach to the base of the peak is covered in my previous report, so I’ll just comment that the plod is pretty uneventful especially having done it so recently.
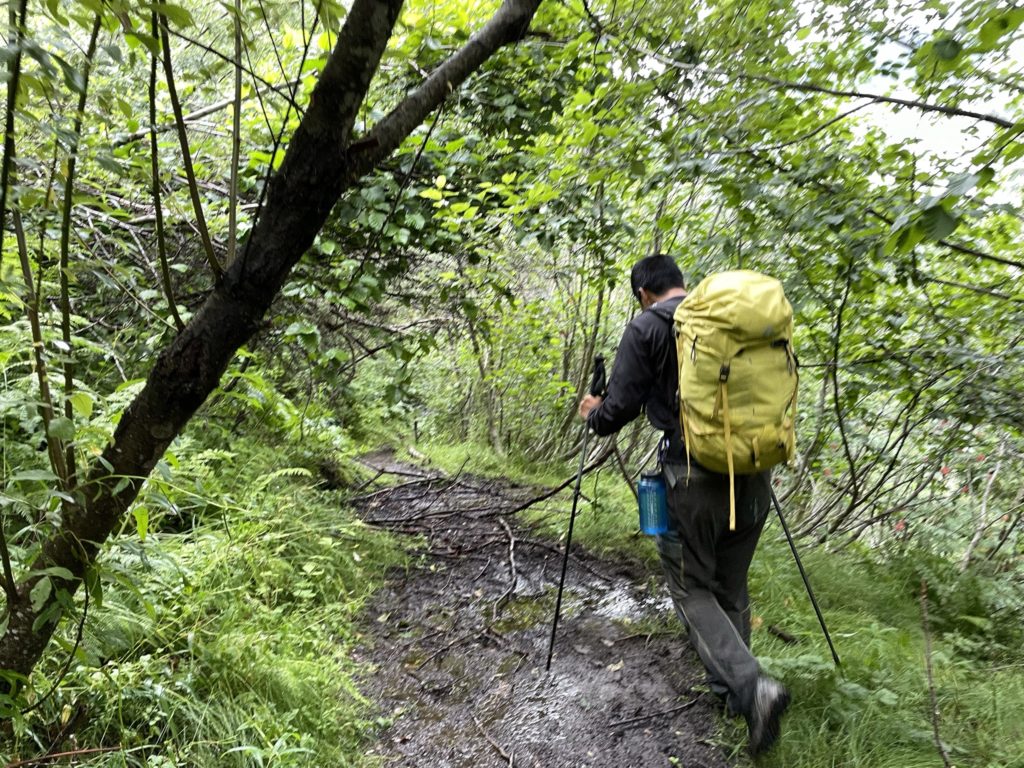
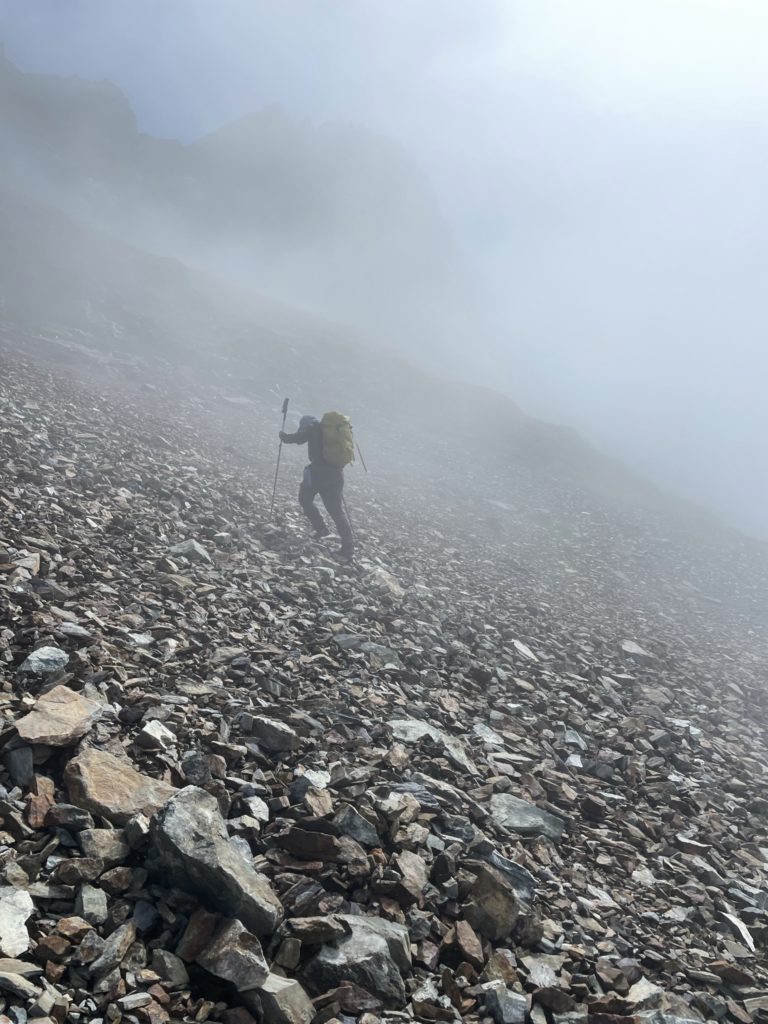
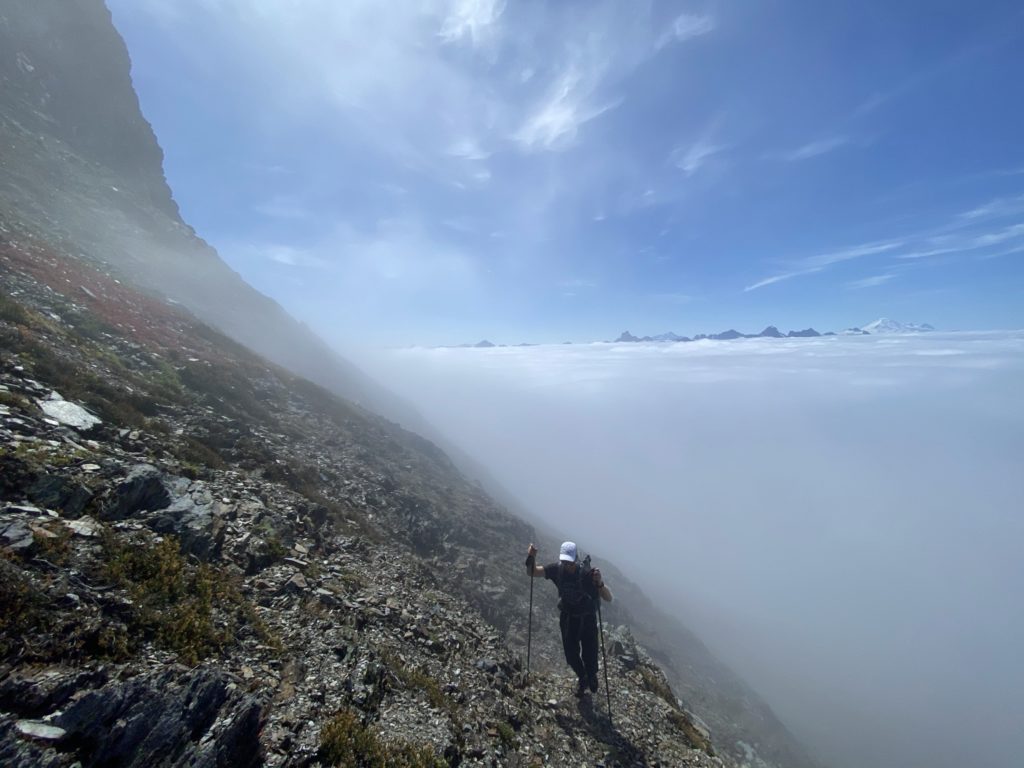
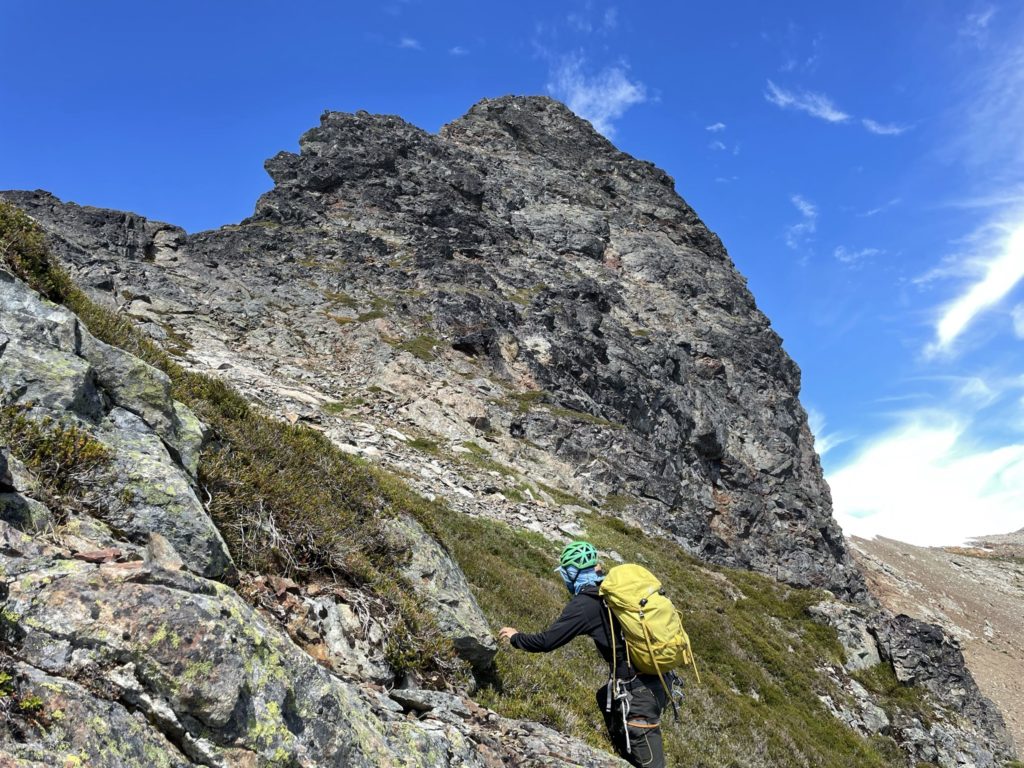
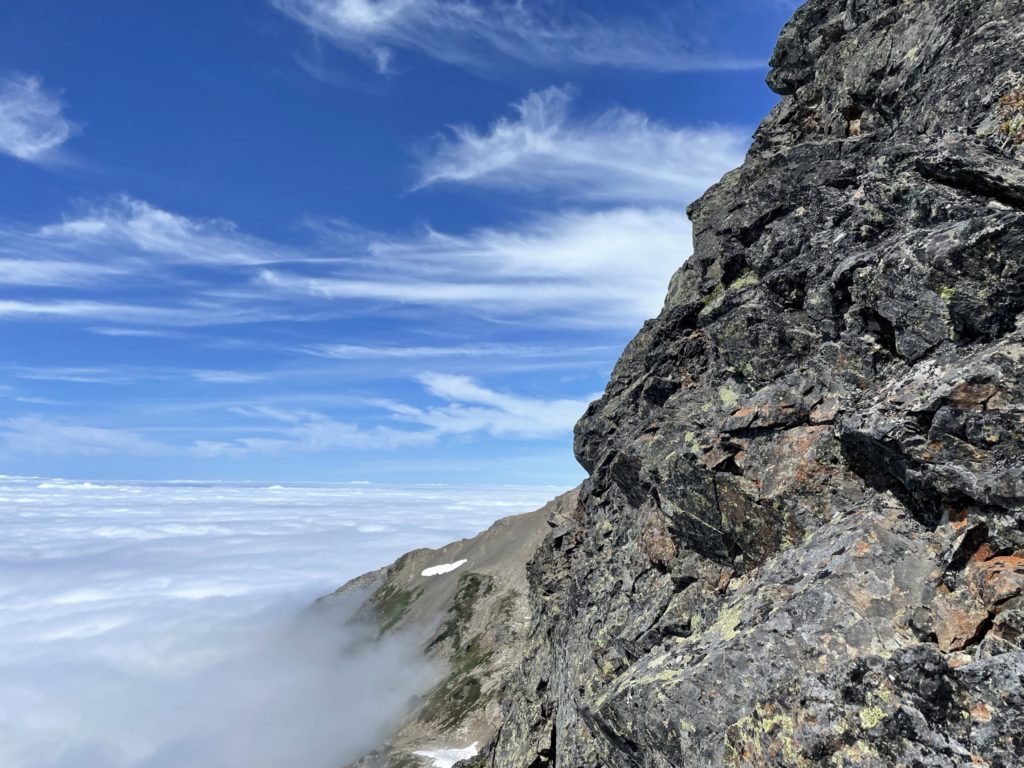
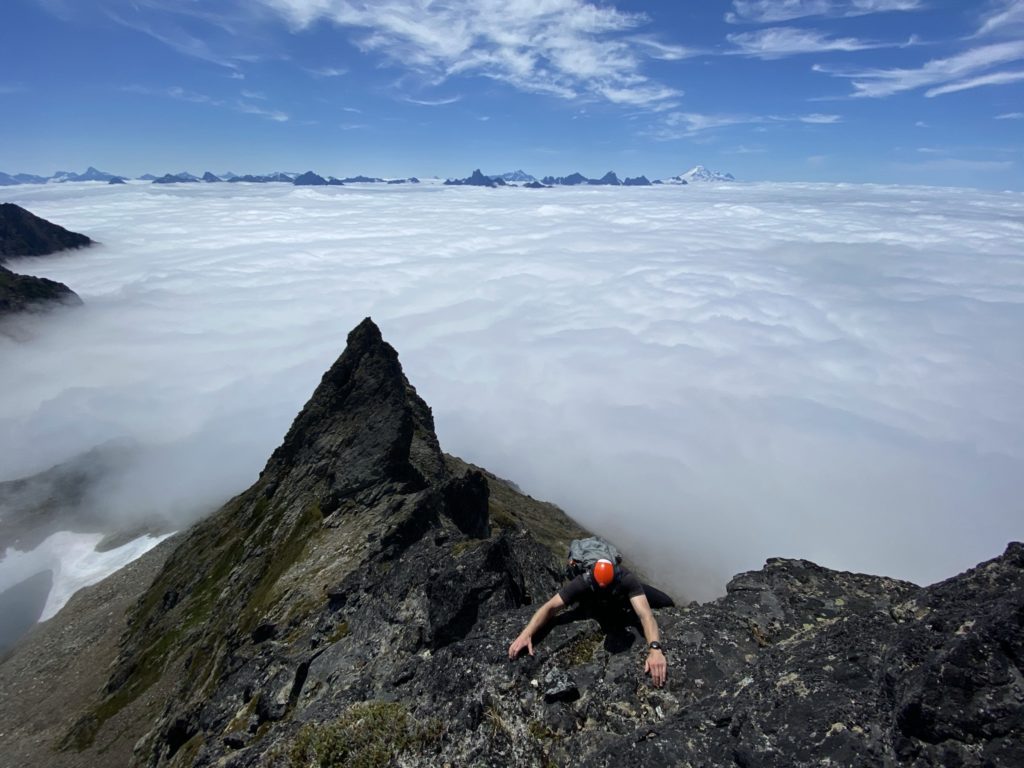
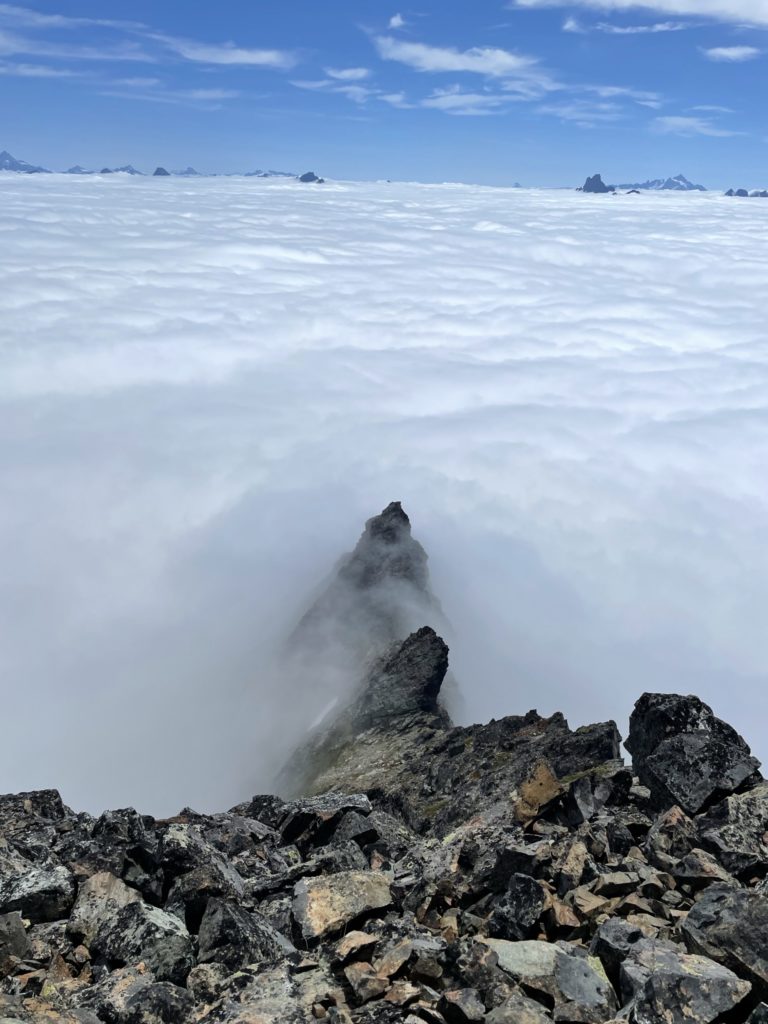
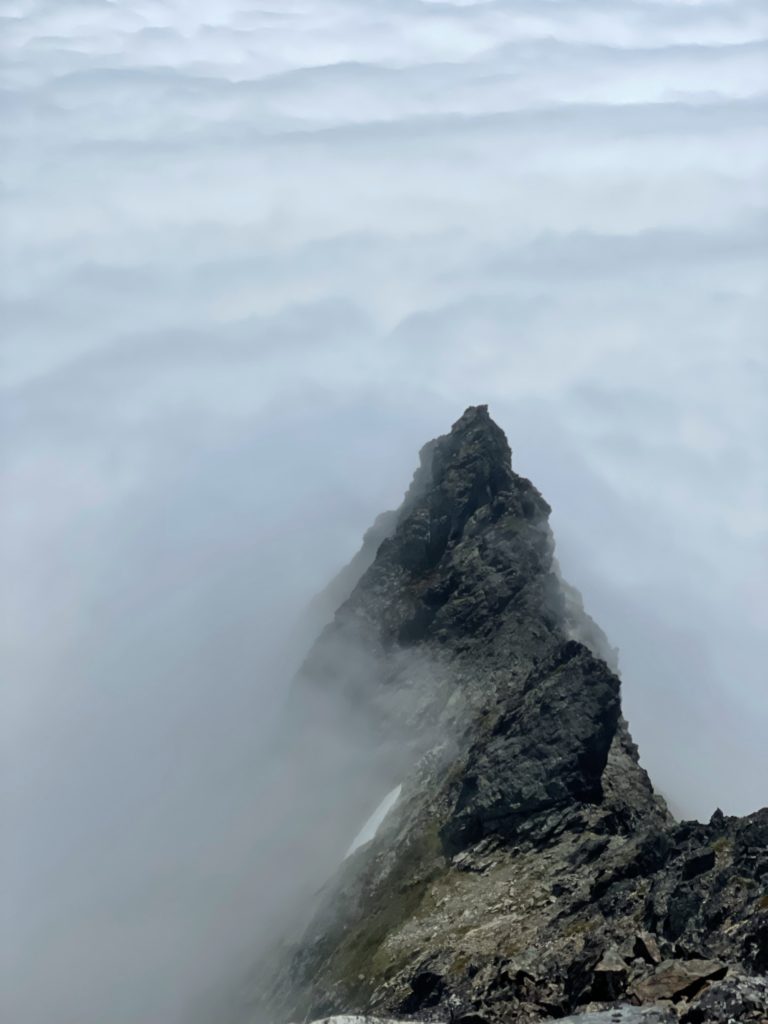
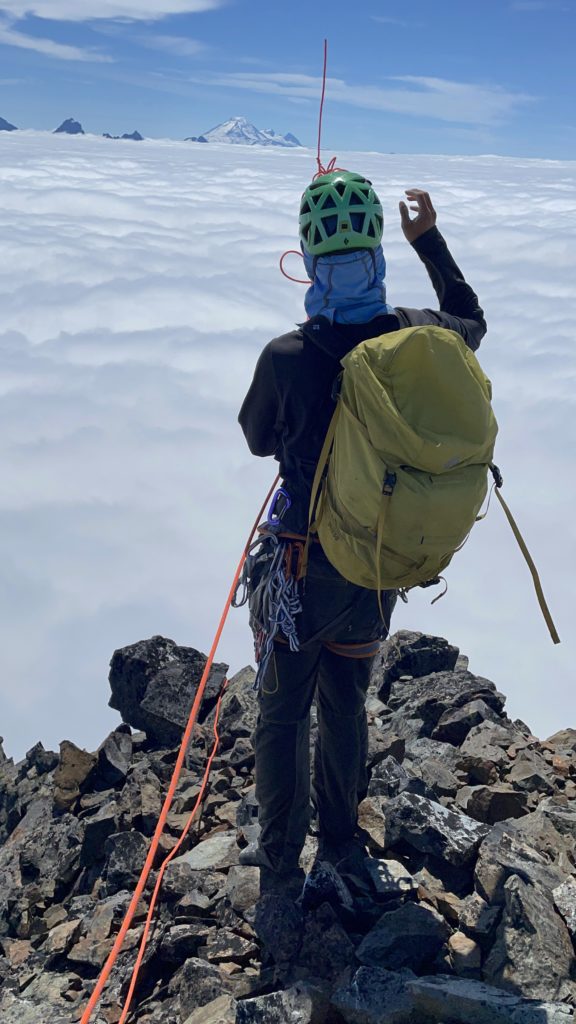
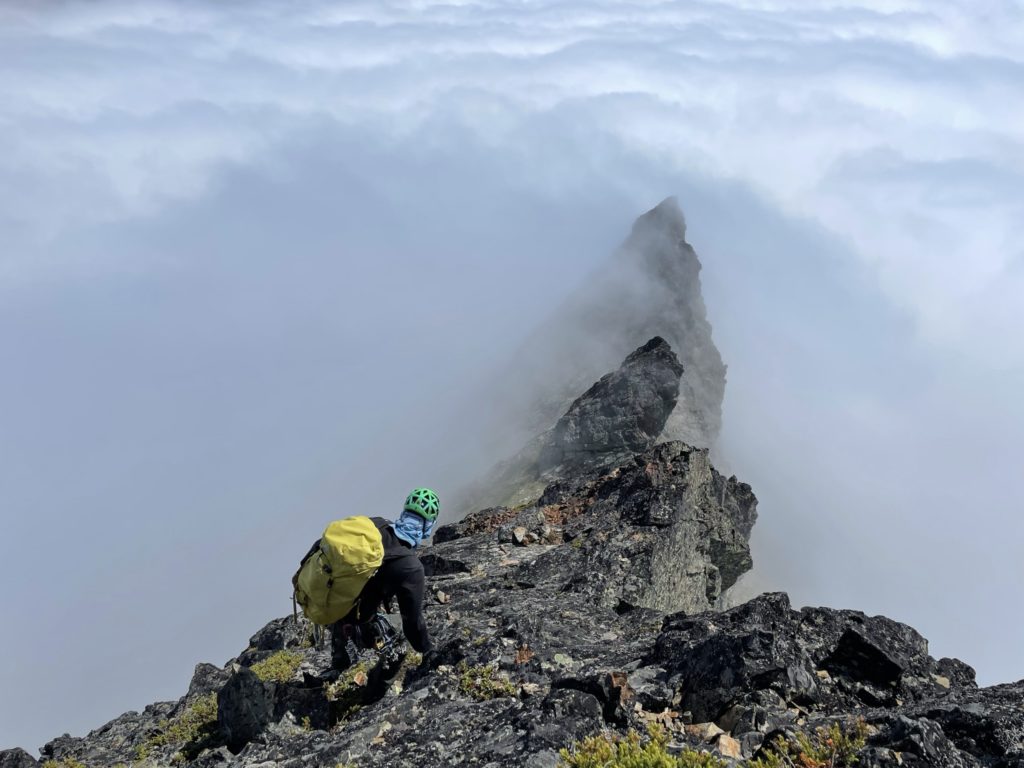
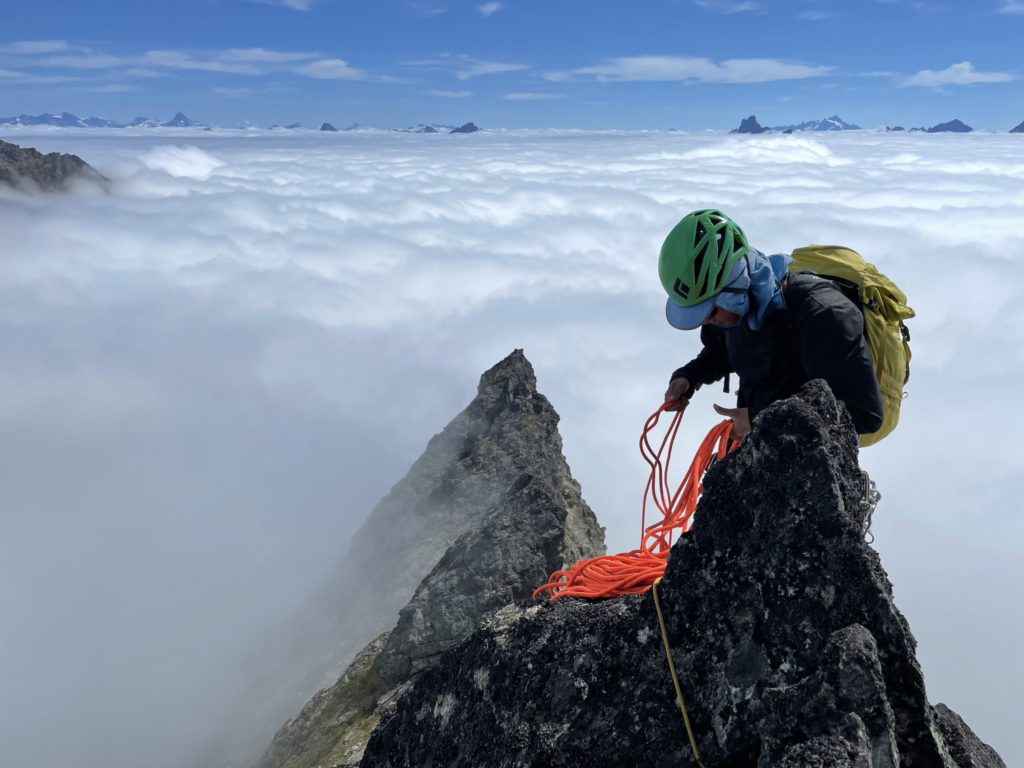
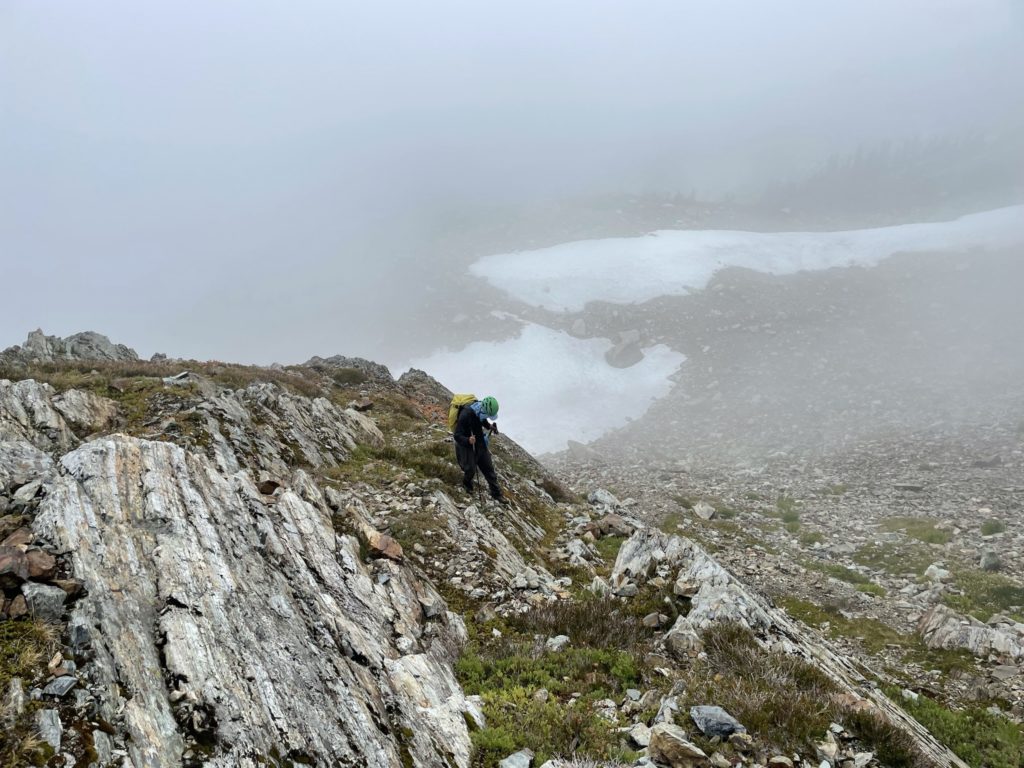
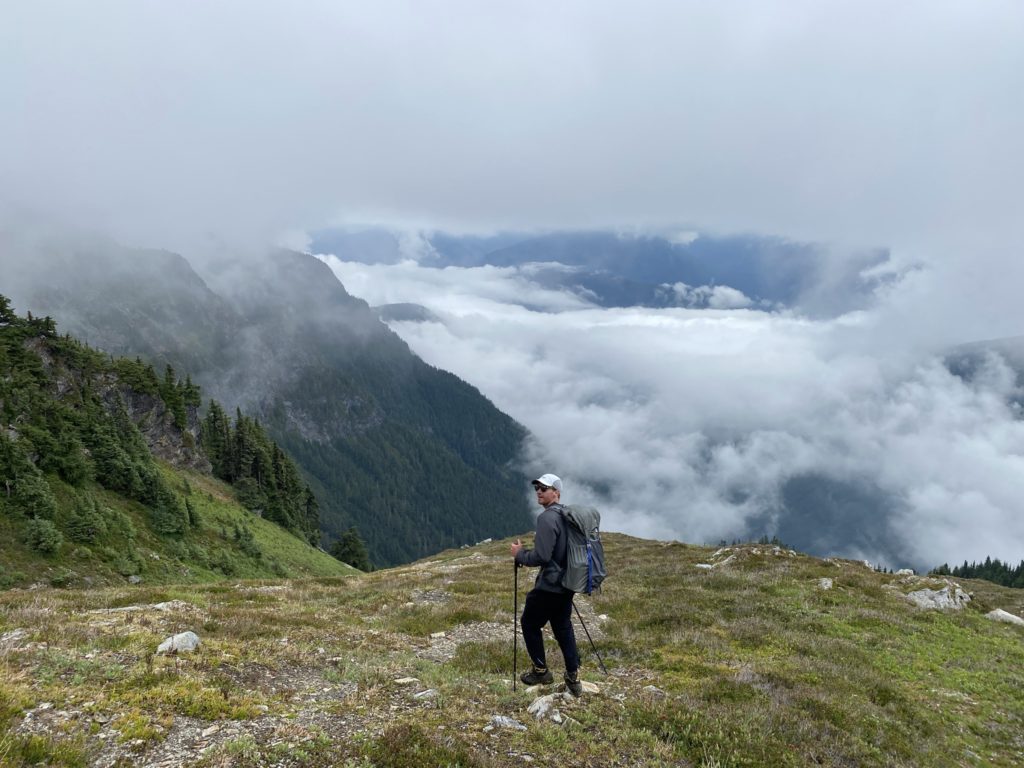
Once we reached the alpine, the route was still engulfed in clouds. Thankfully, I was able to navigate us to the gully that previously took me to the lower scree slopes below the summit ridge line. From there, we ascended mostly straight up the slope along scree covered slabs to gain the ridge. As we rose higher up the slope, we started to ascend above the cloud layer. Soon enough, we were standing above a beautiful inversion with only the highest peaks poking out; giving the illusion of isolated islands.

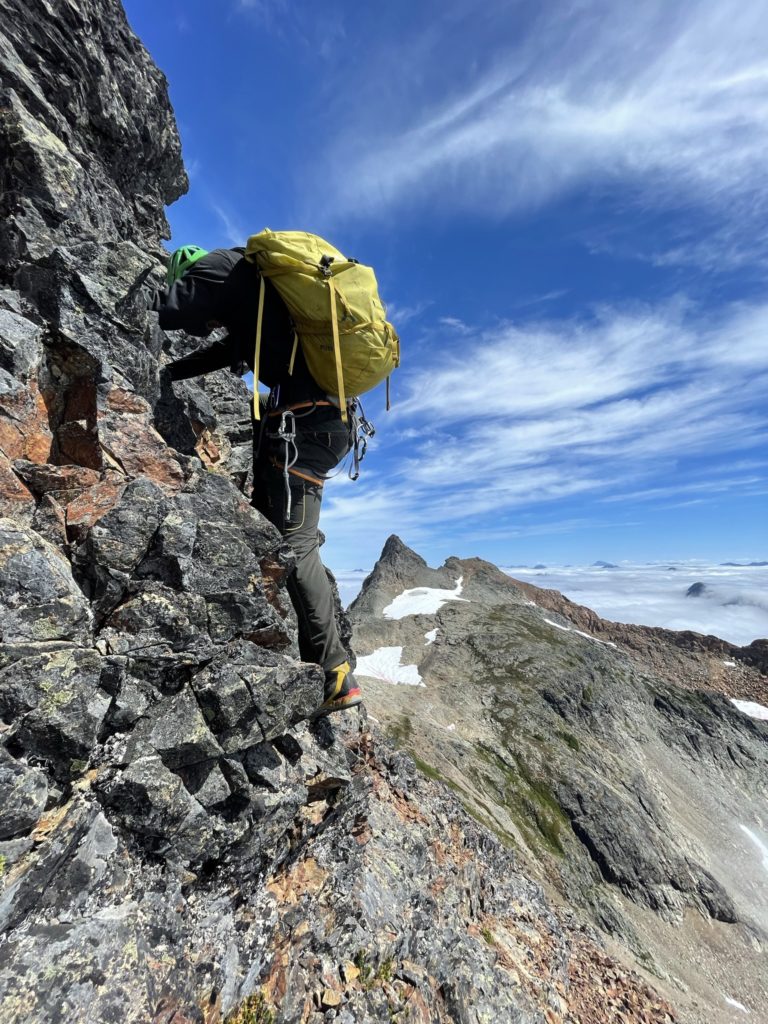
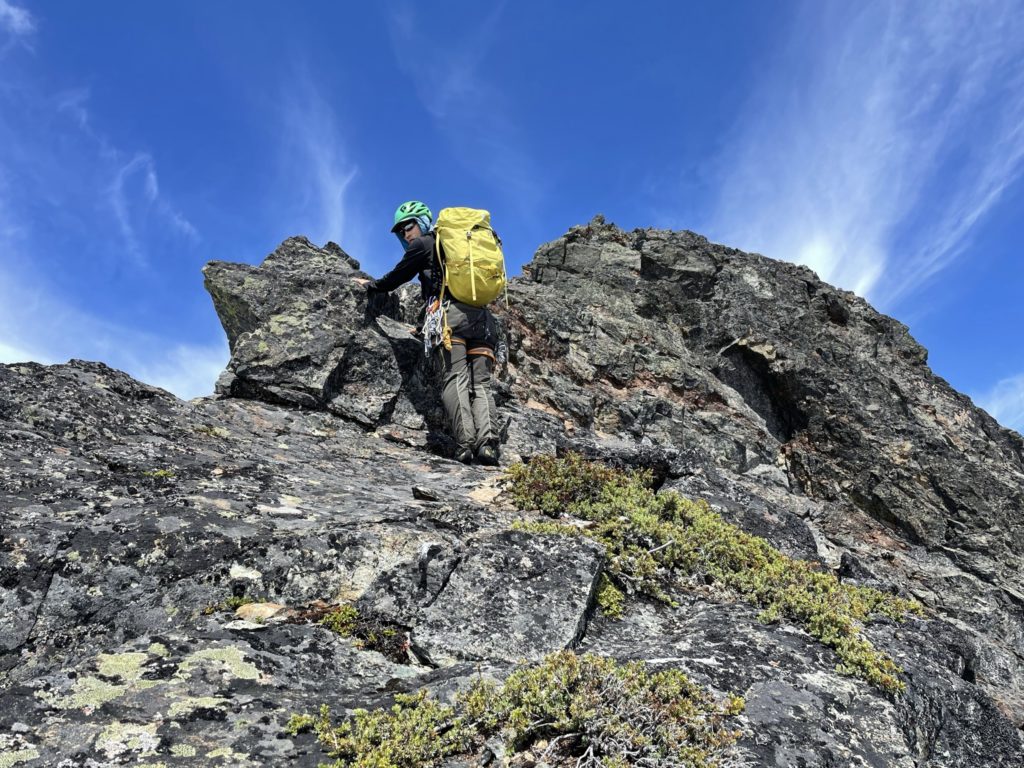
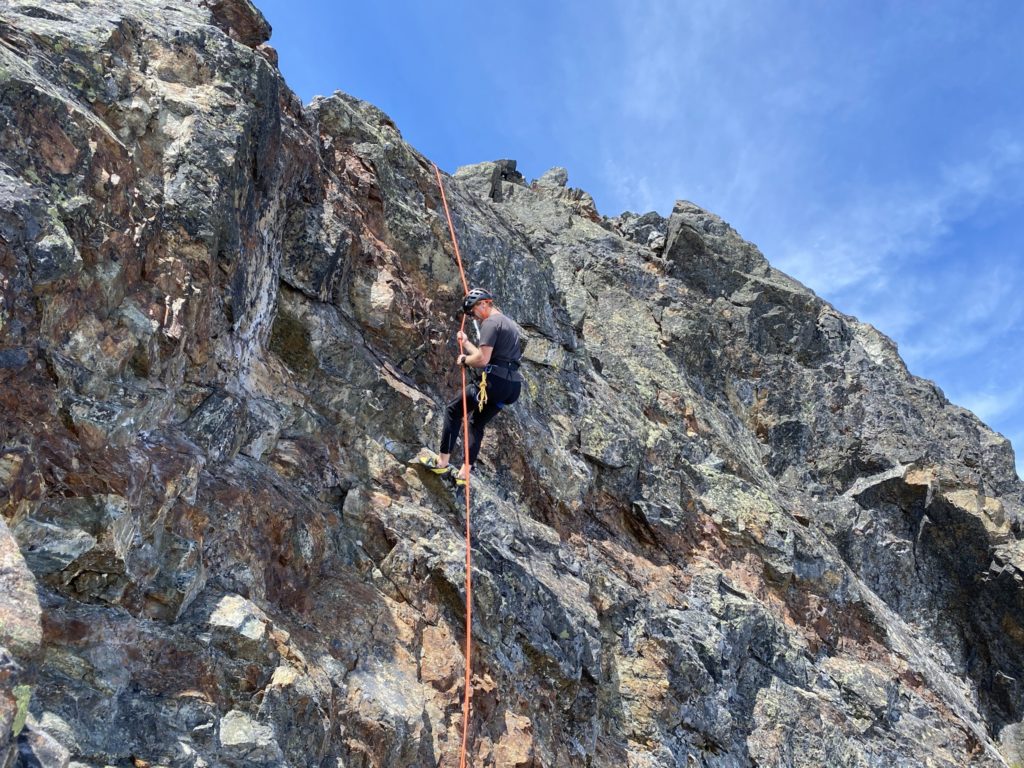
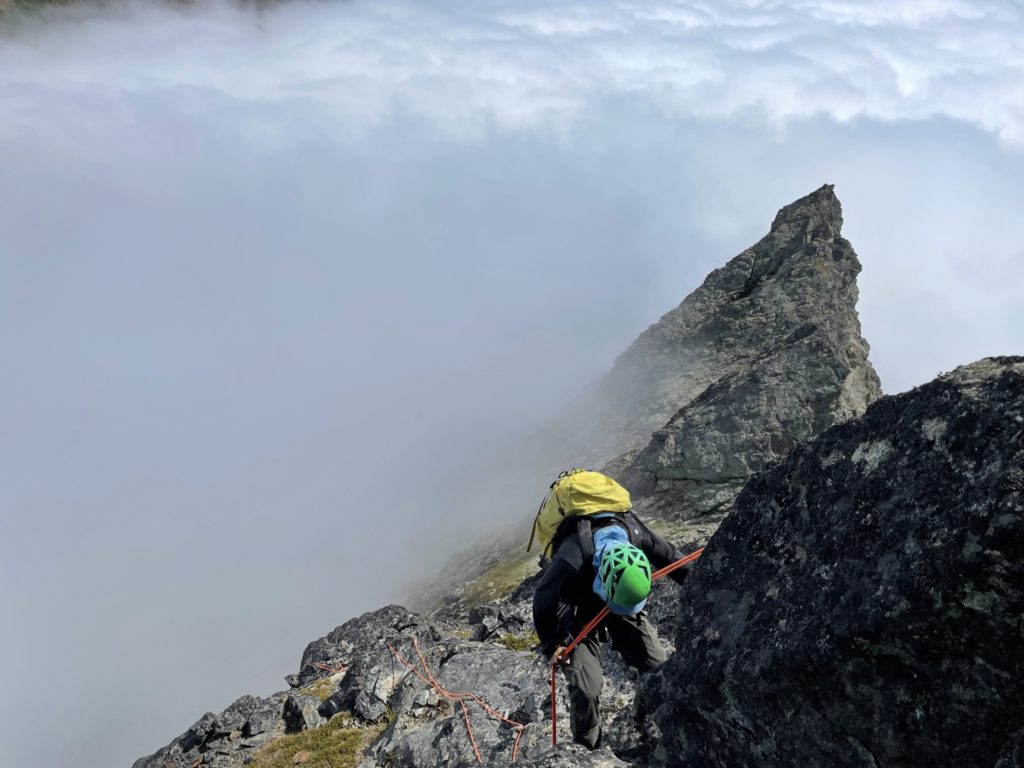
Shortly after we reached the base of the ridge and then had to traverse climber’s right to reach the weakness in the ridge the Jacob and I went up in the previous attempt. Steven lead the way up first and then I followed up and topped out on the ridge line. On the other side was the exposed 4th class ledge traverse that Jacob went around last time. Steven went first and and then I followed suit. There’s a committing stem move at the highest point, but other than that it was straightforward. After the ledge traverse it’s simple scrambling to regain the ridge before the fun starts.
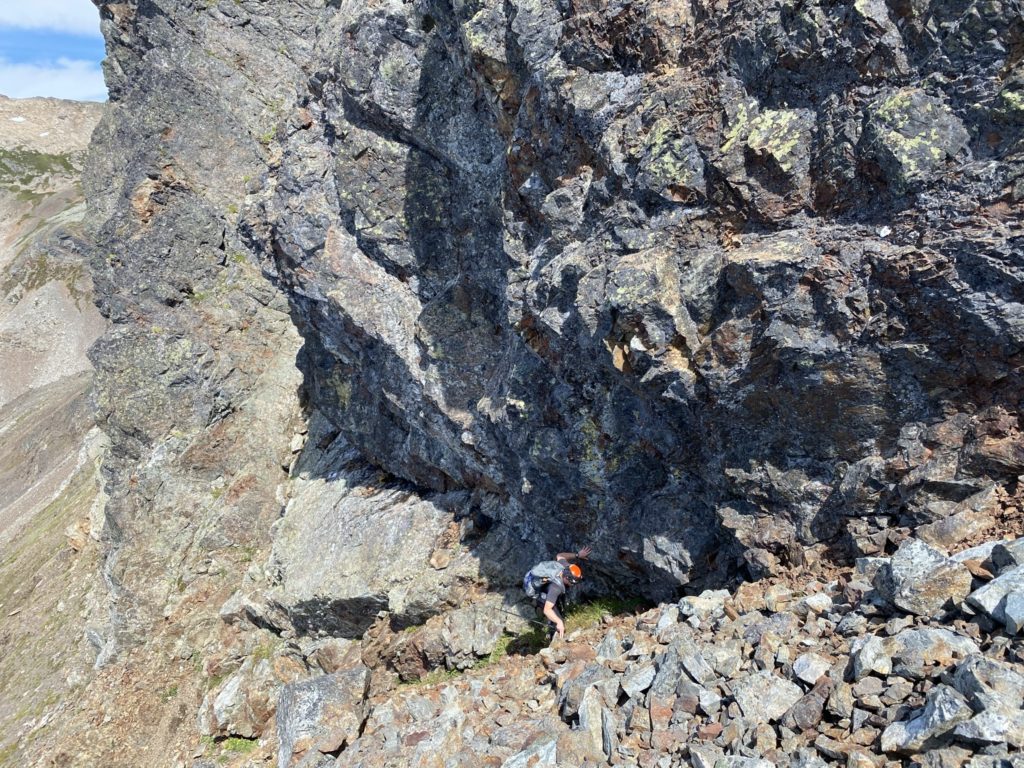
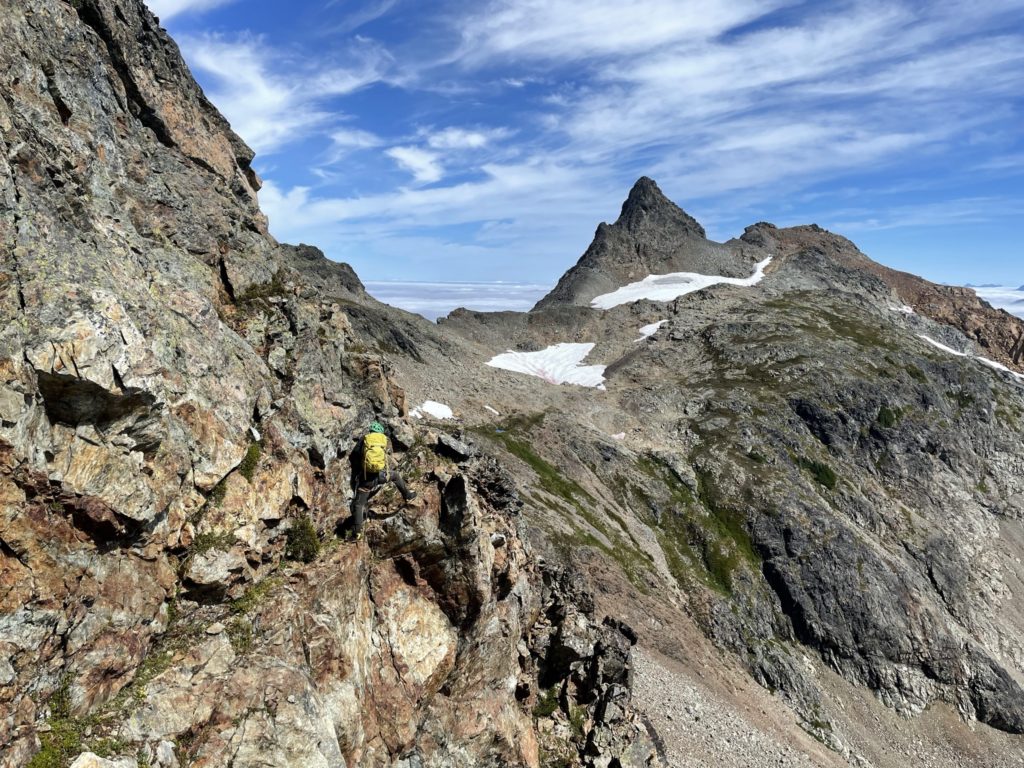
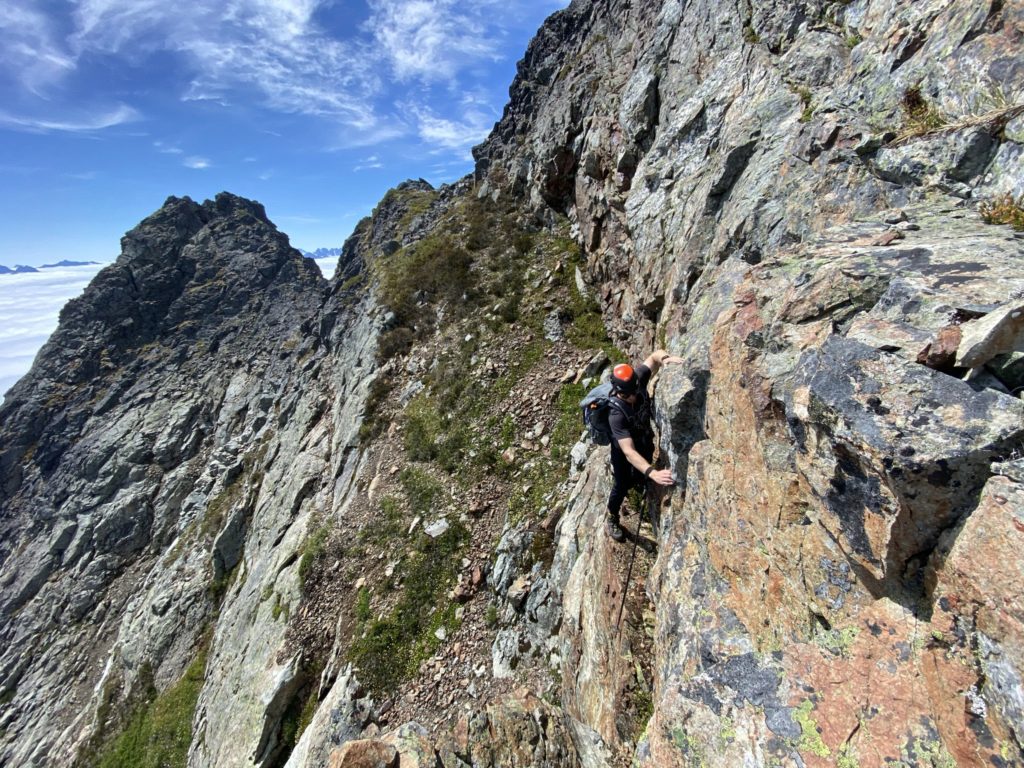
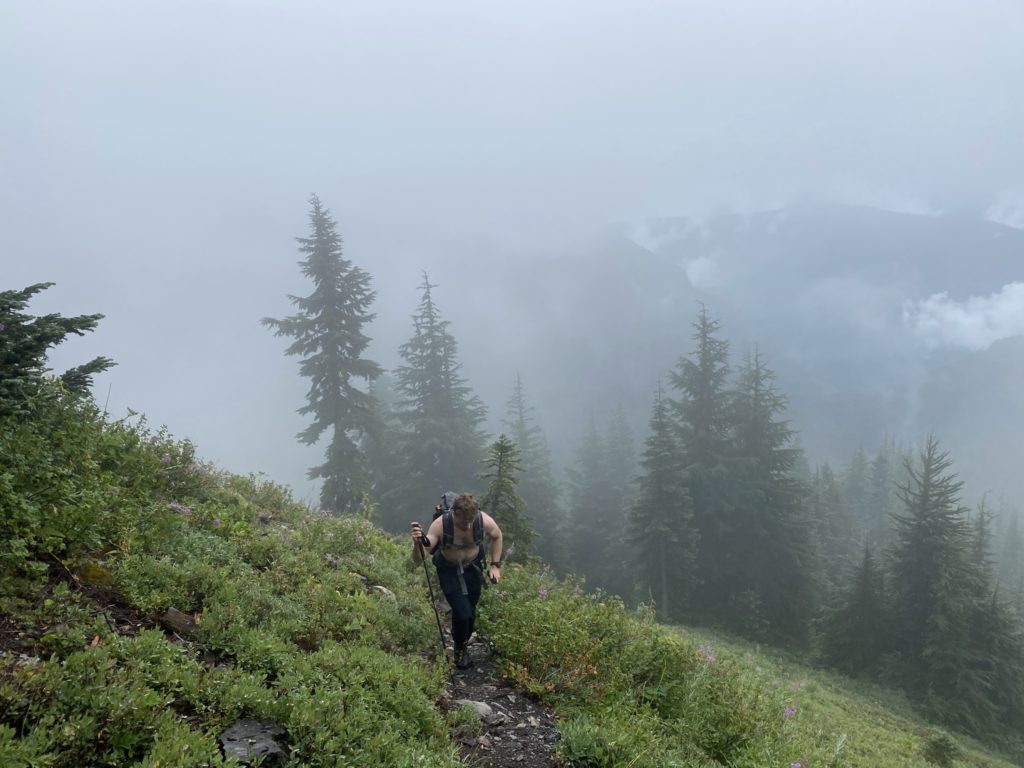
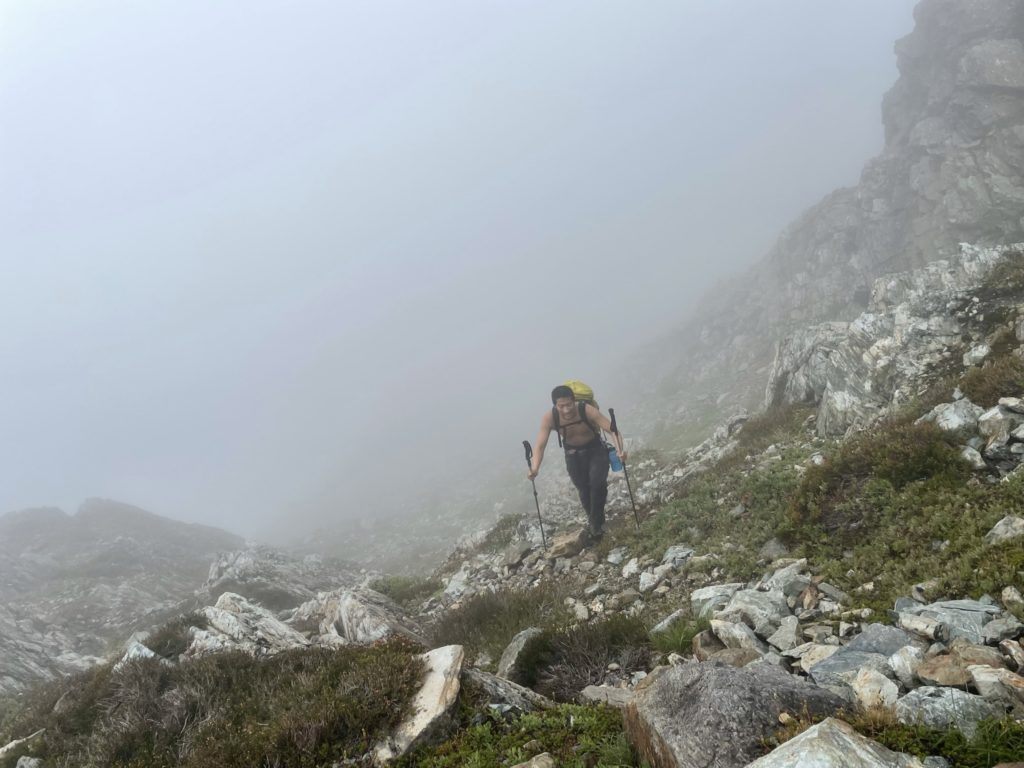
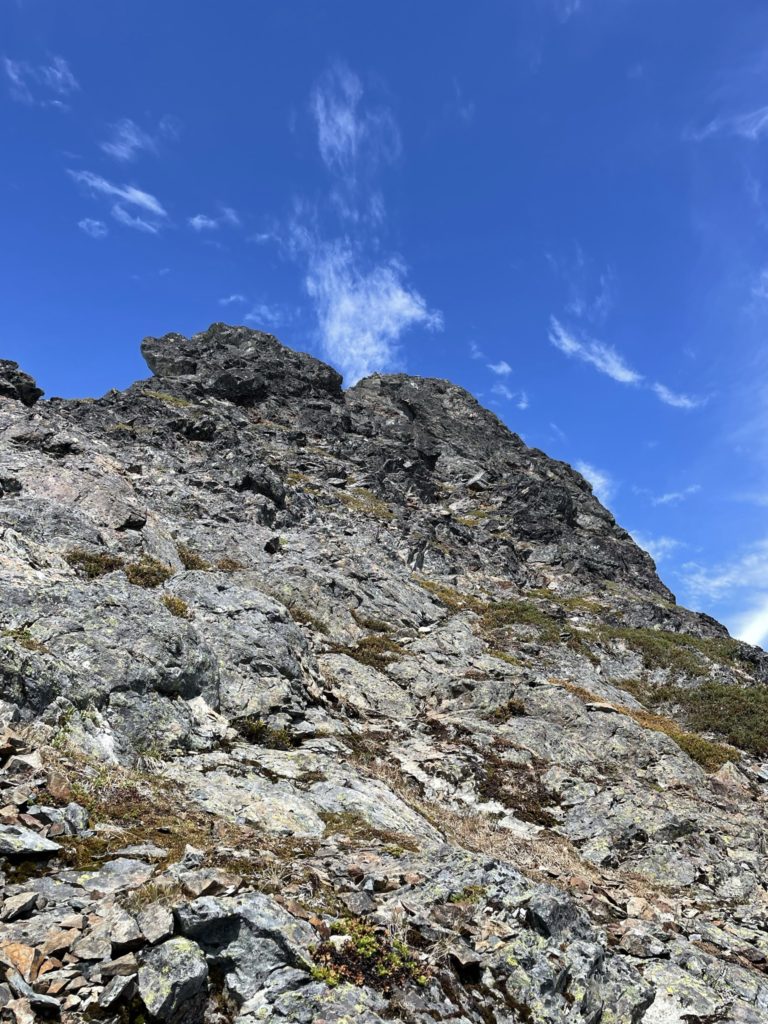
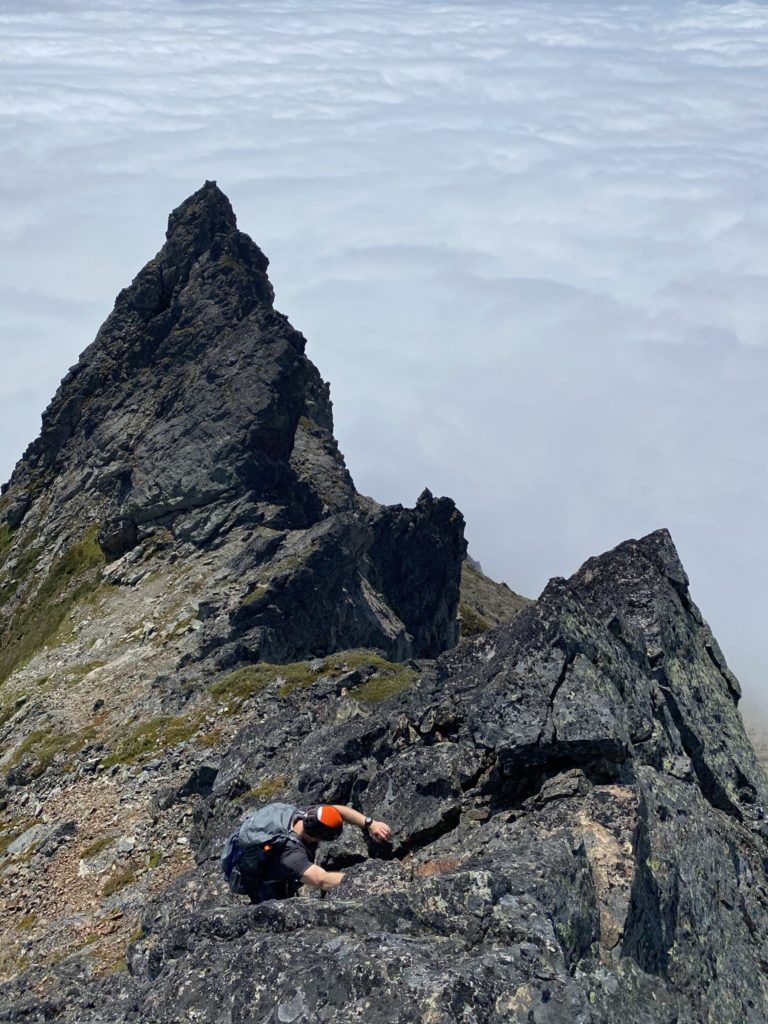
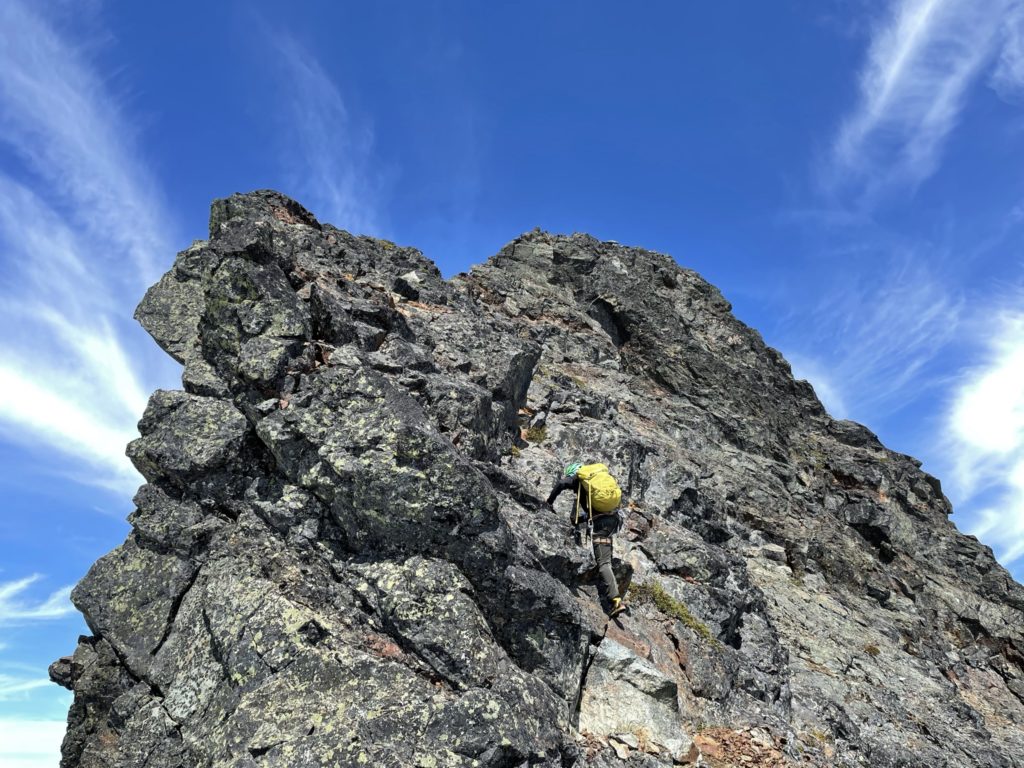
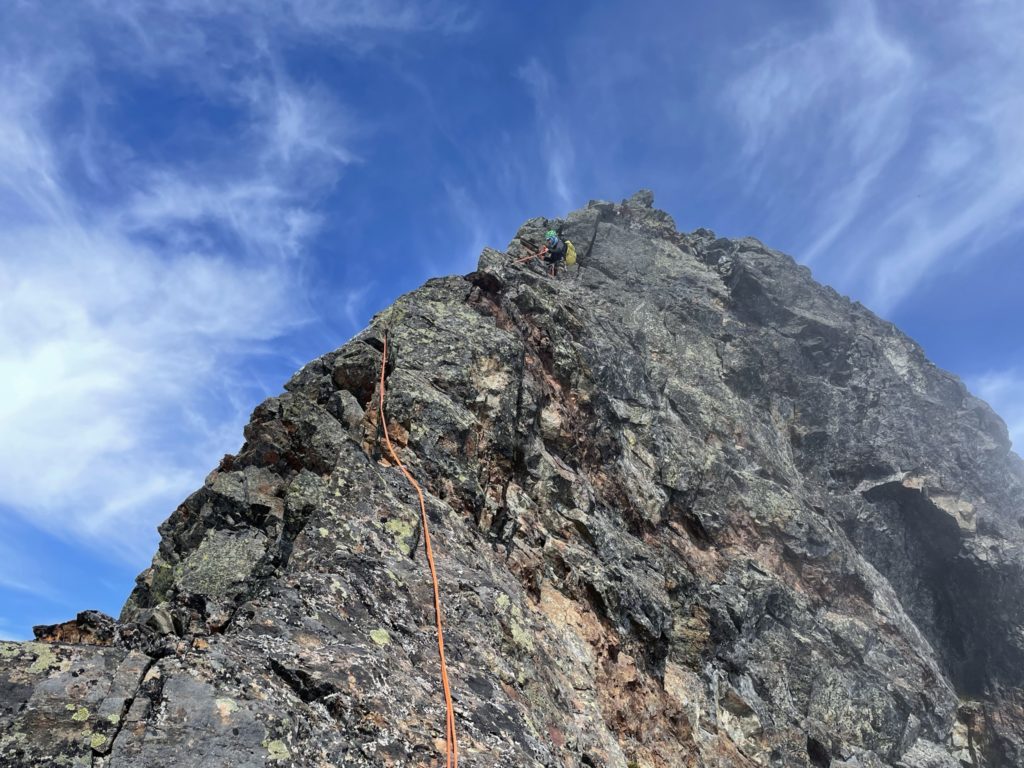
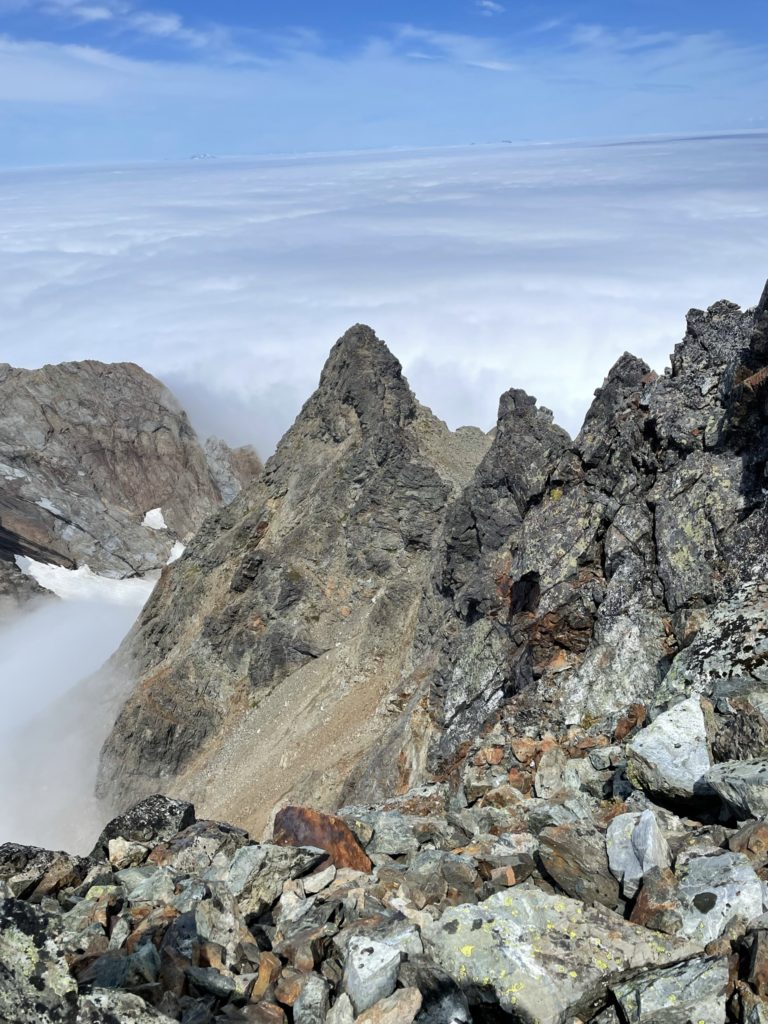
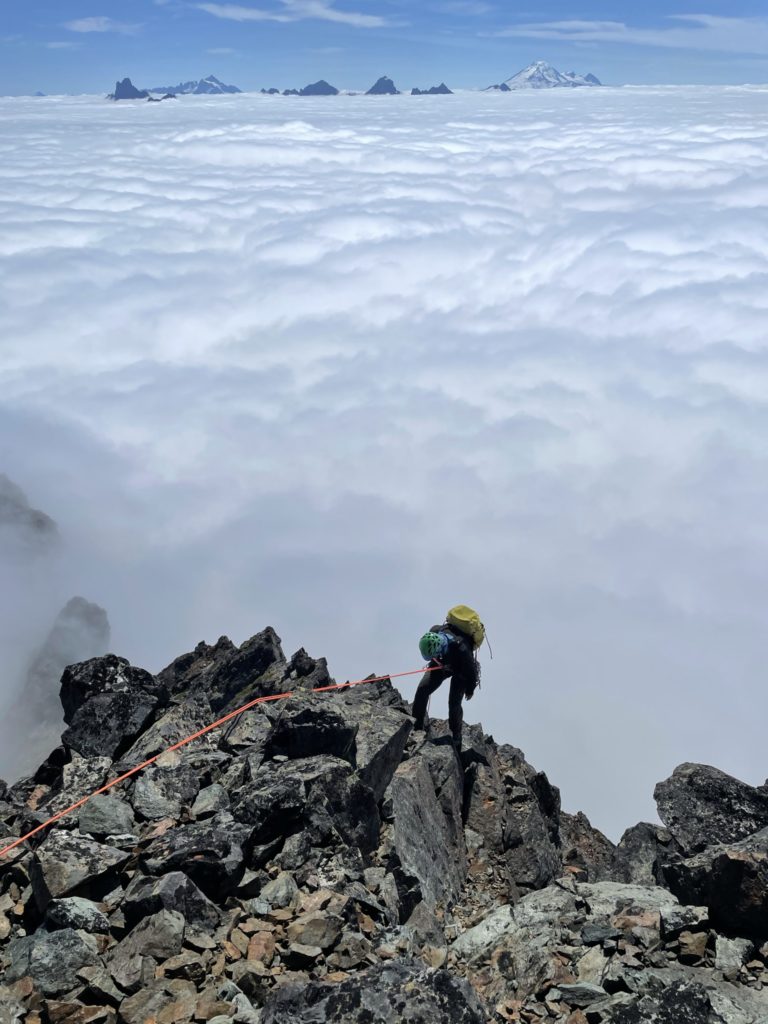
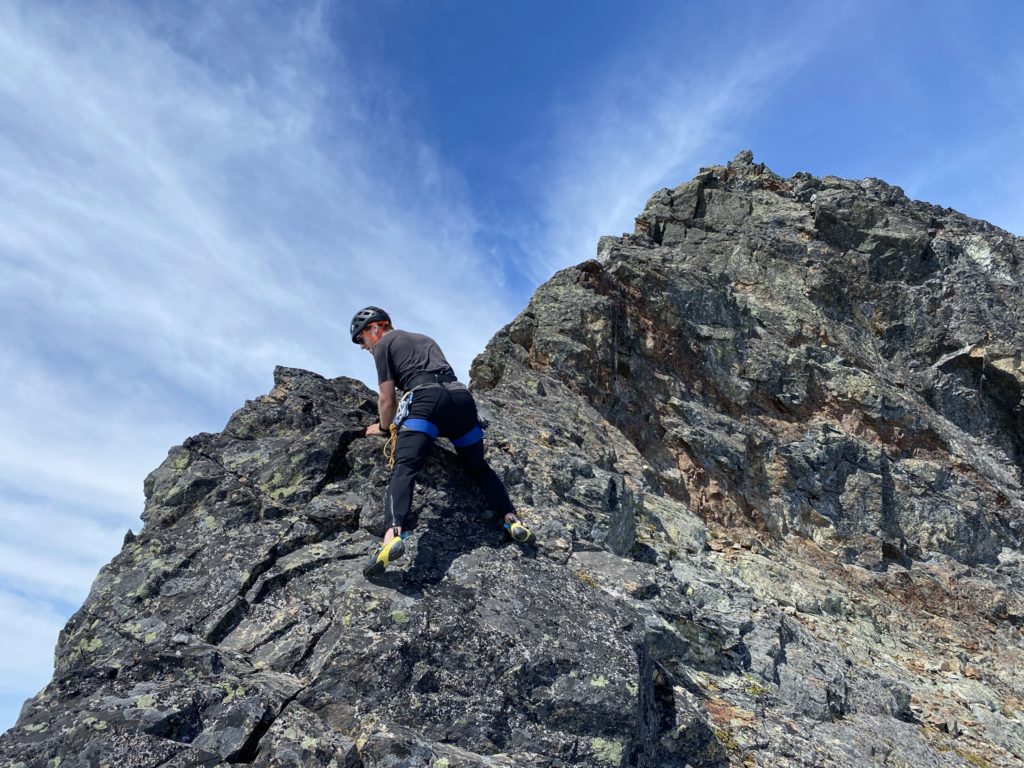
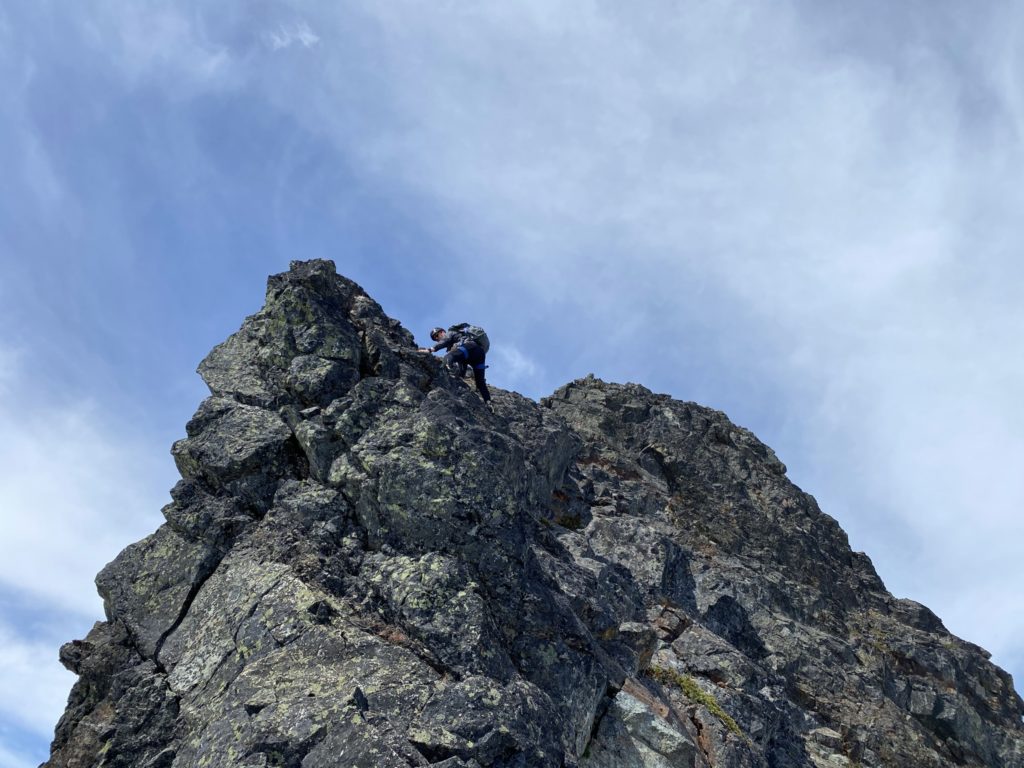
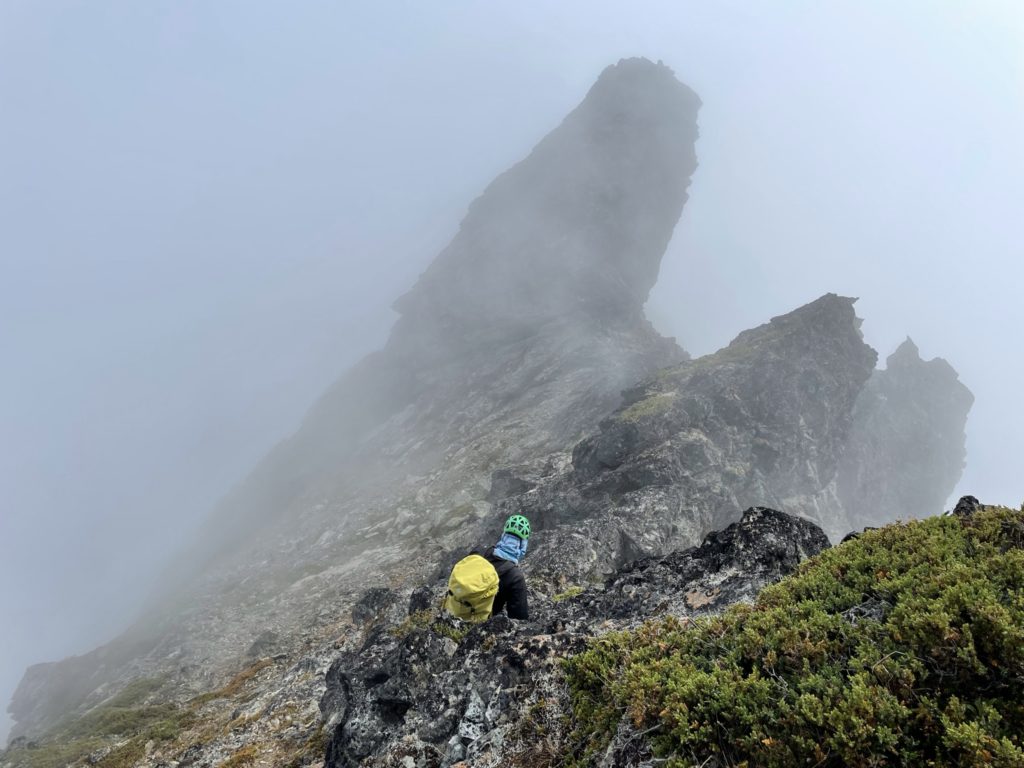
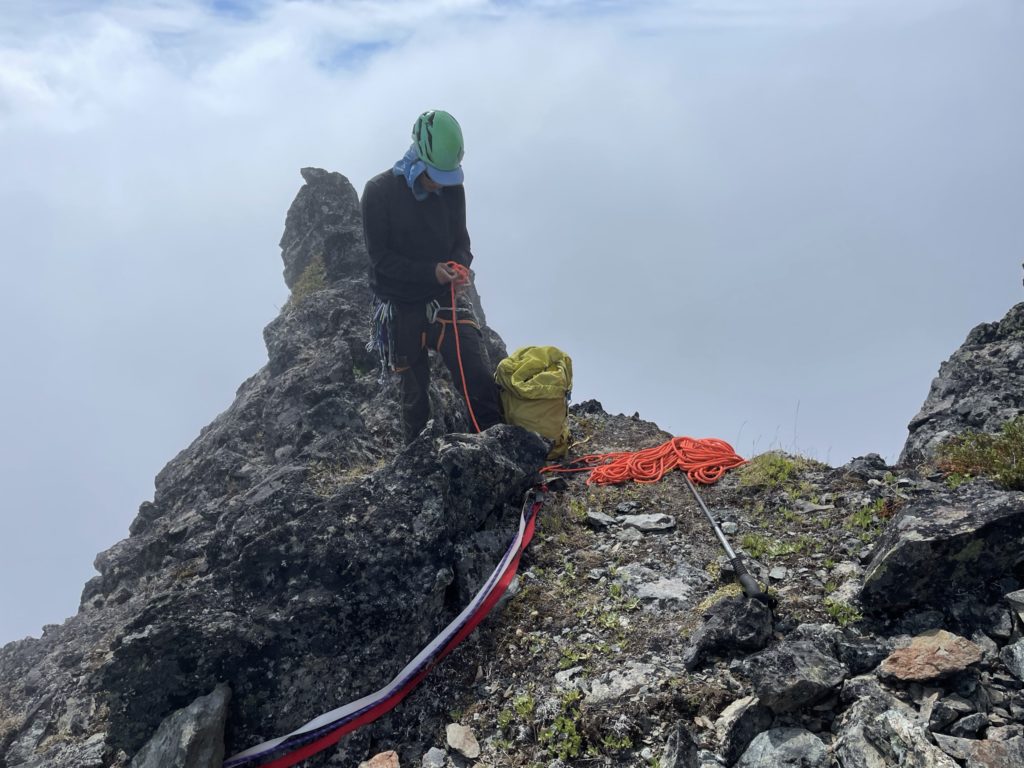
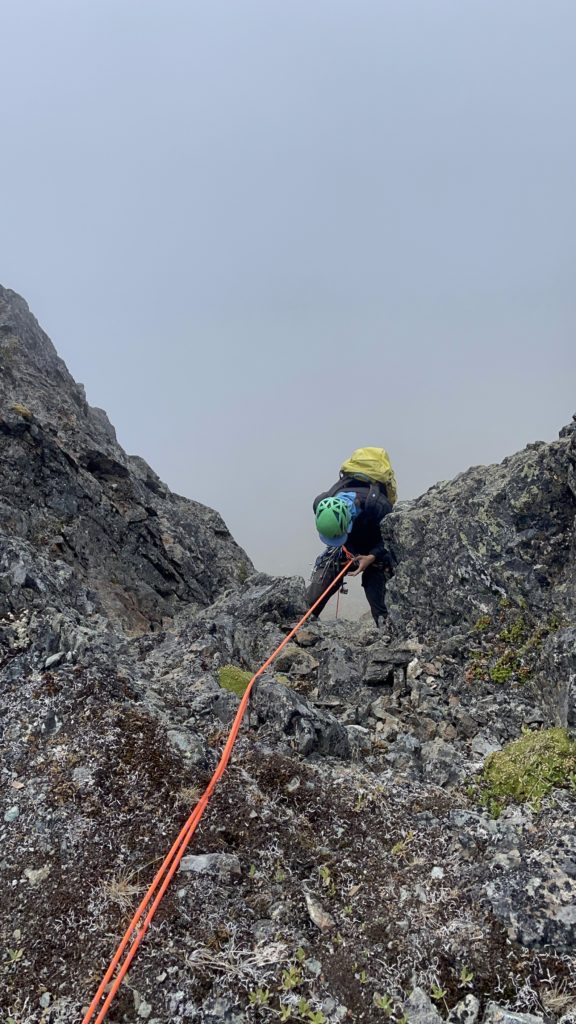
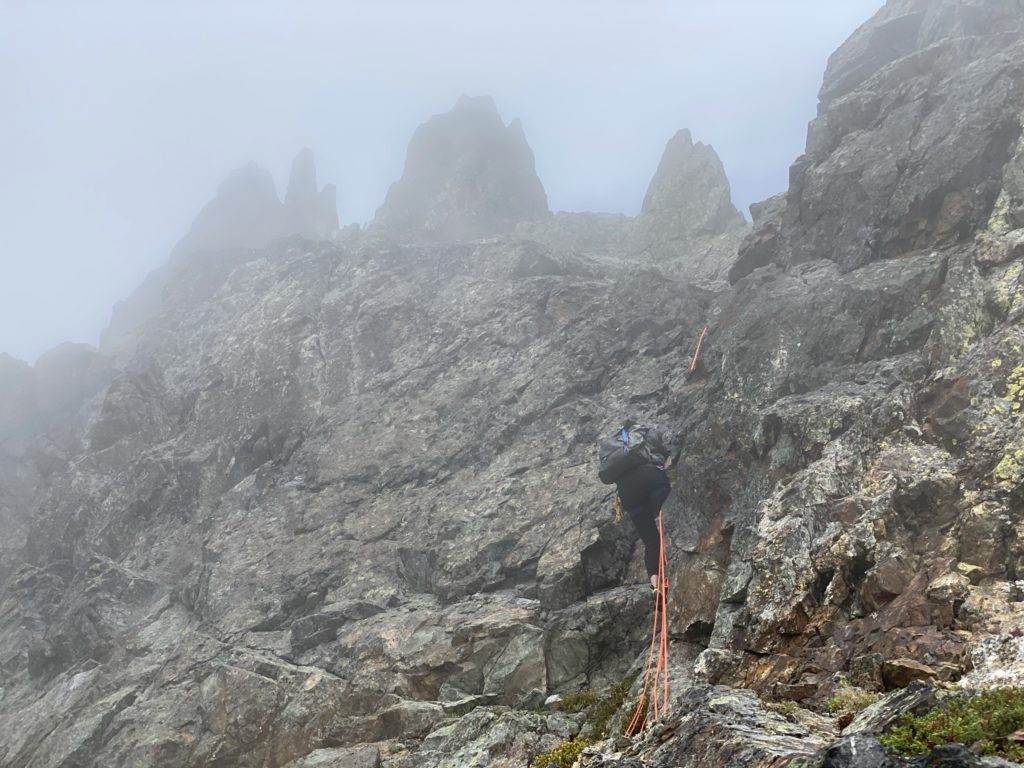
From the ridge is a series of 3rd and 4th class sections with varying levels of exposure and rock quality. Many of the hand and foot holds are loose or cracking so we had to be quite cautious as a few moves are directly above airy sections of the ridge. As we continued scrambling up the ridge, we started to see the crux of the route that had been described in the two trip reports I found online about this summit (here and here). Steven started scouting for a good anchor to build a belay station, but most of the options were crumbly or cracking boulders. Just before the crux, we took a quick break to swap into climbing shoes. Then, we kept pushing up in search of a better anchor station and had to do an exposed traverse on some low angle slabby terrain before finding something satisfactory.
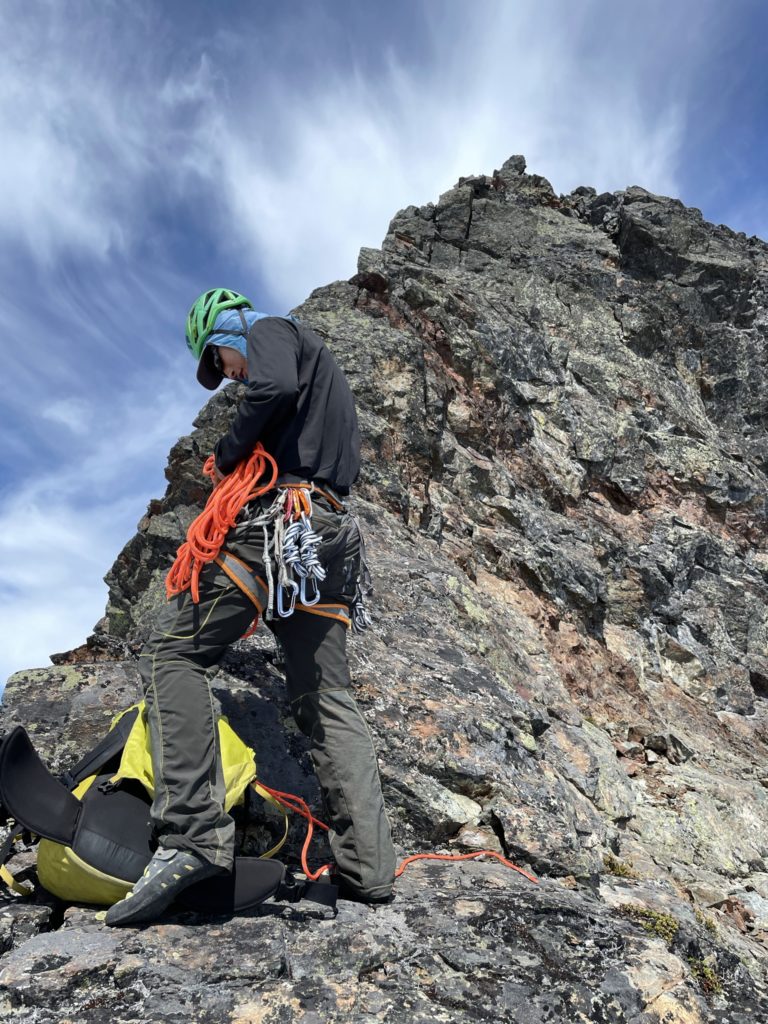
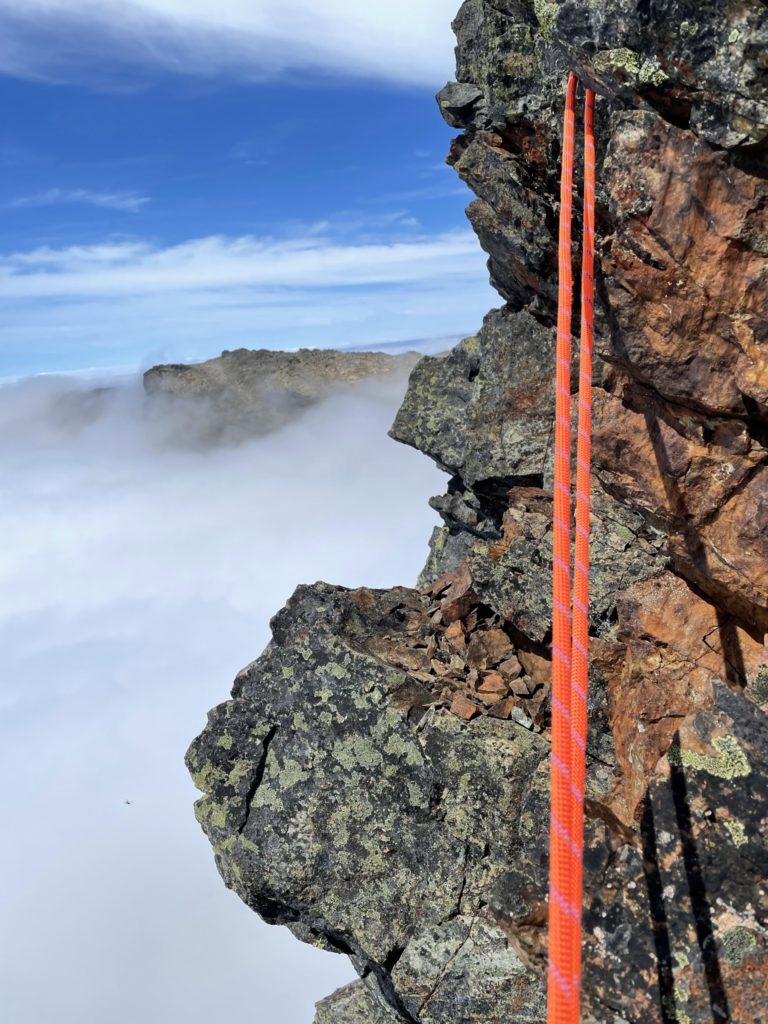
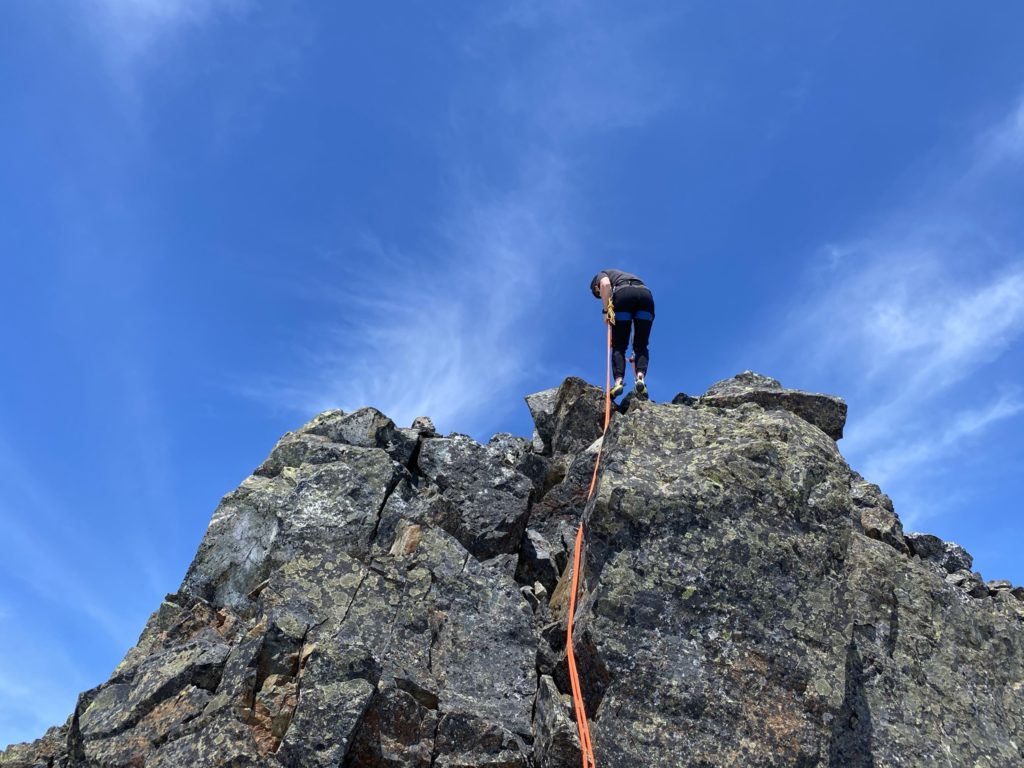
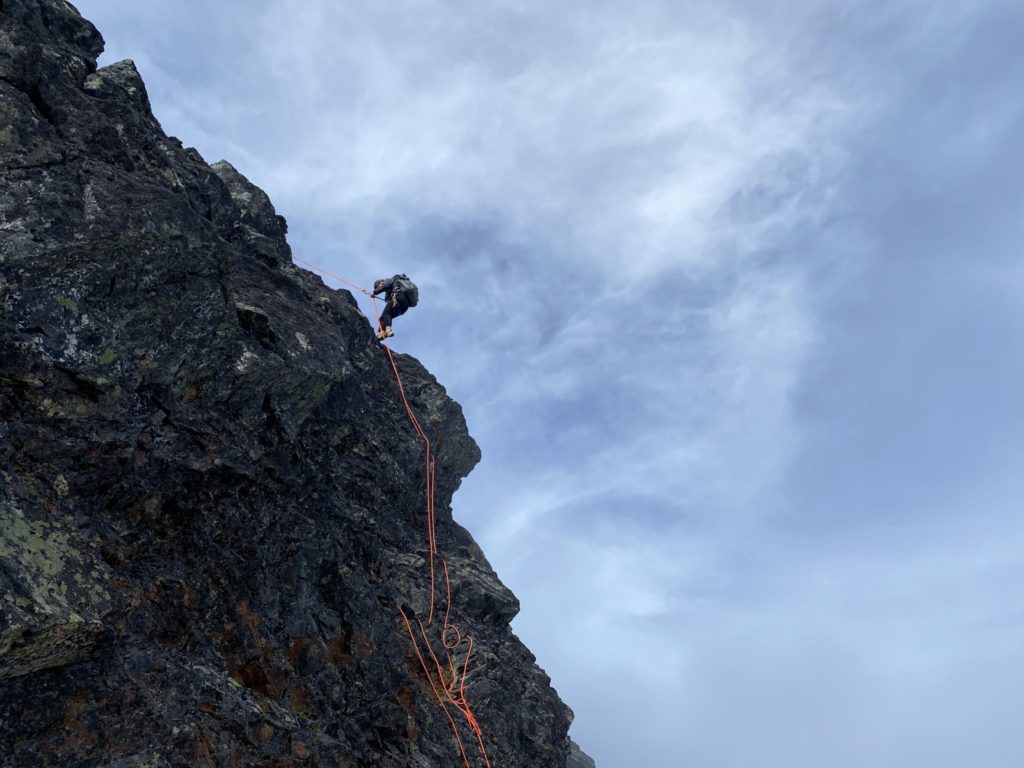
Steven got to work and built a belay anchor for us on a solid boulder while I took off my bag and ditched the remaining gear. All of this was a first for me, so Steven kindly gave me a crash course on lead belaying with a twin rope setup and a communication plan for leading and following. With the plan in place, Steven started leading up towards the crux move. He set one anchor just before and then made the airy step out over the ridge and then up the western side of the ridge. Shortly after he reached the next anchor station and got setup to belay me. Once I had the all clear I started towards the crux move. Despite how exposed this move was, having the rope eliminated any fear for me and I found the route straightforward and fun. I reached the second anchor station shortly after and then we repeated the process over a much smaller section on simpler terrain to reach the summit.
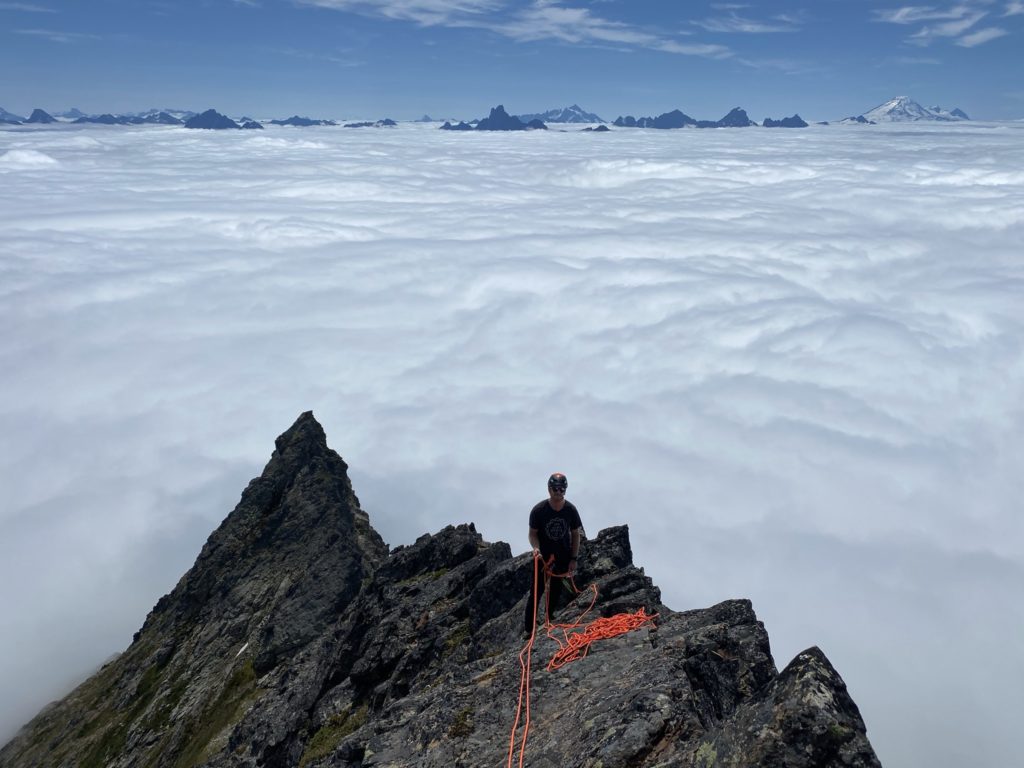
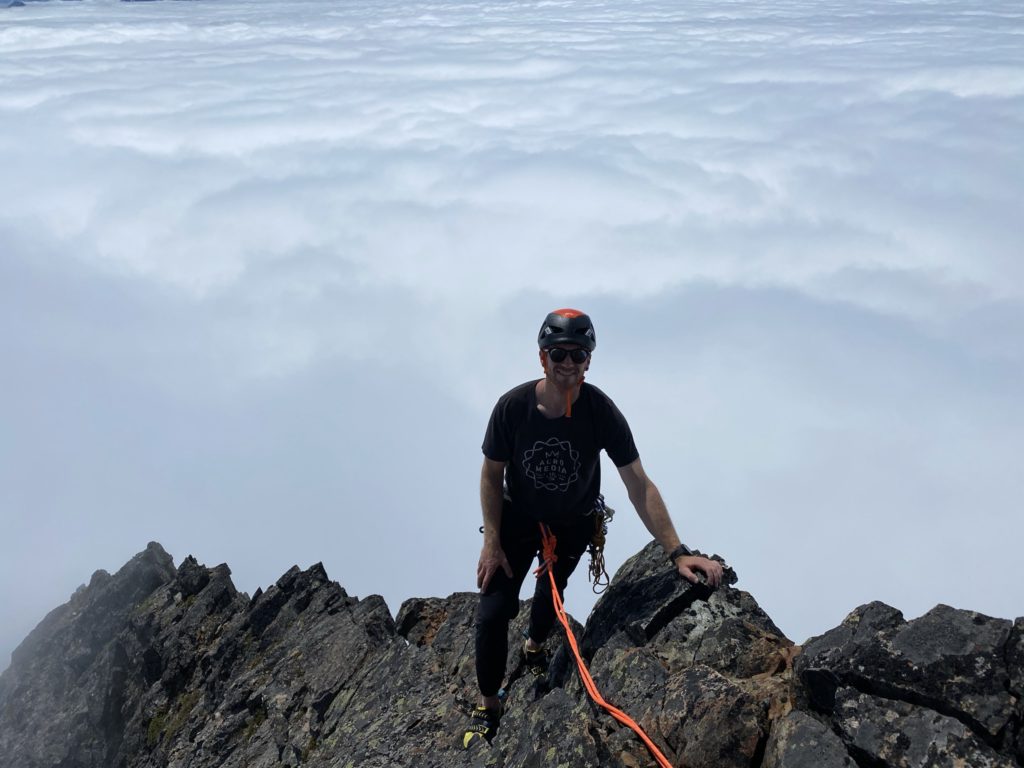
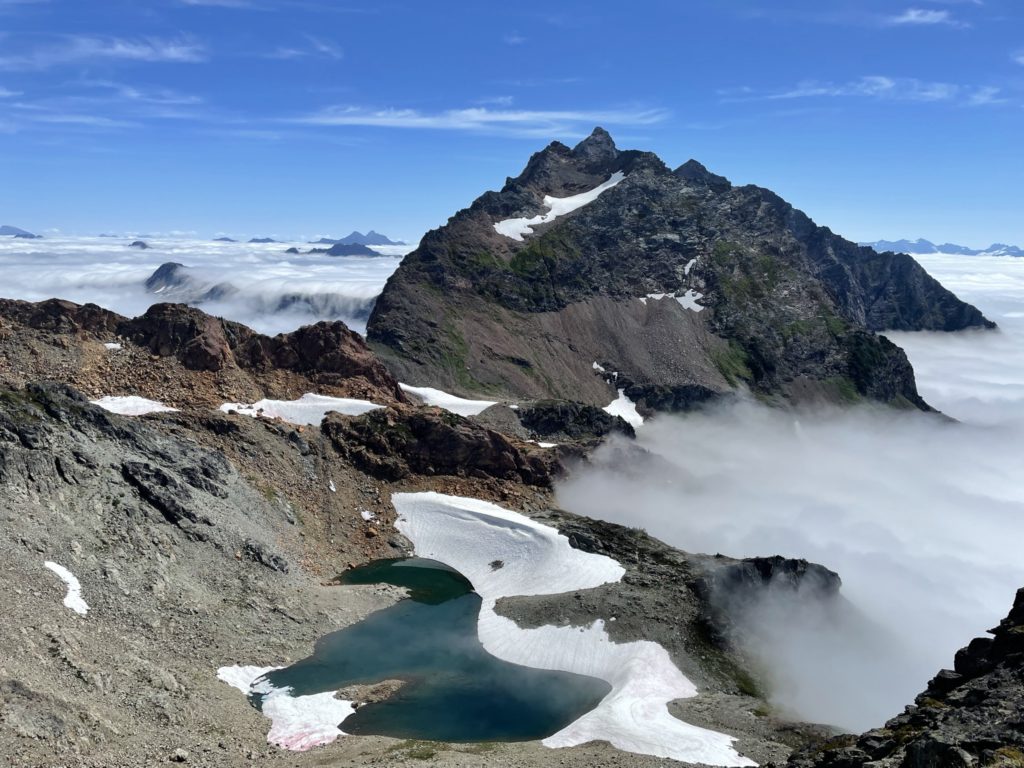
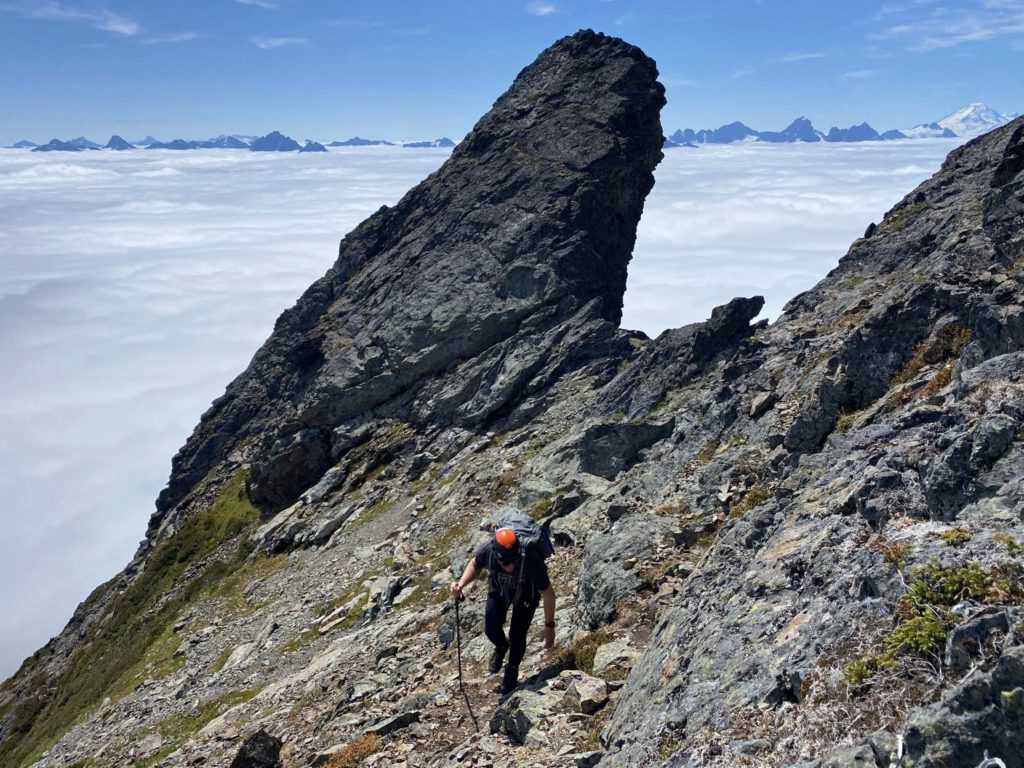
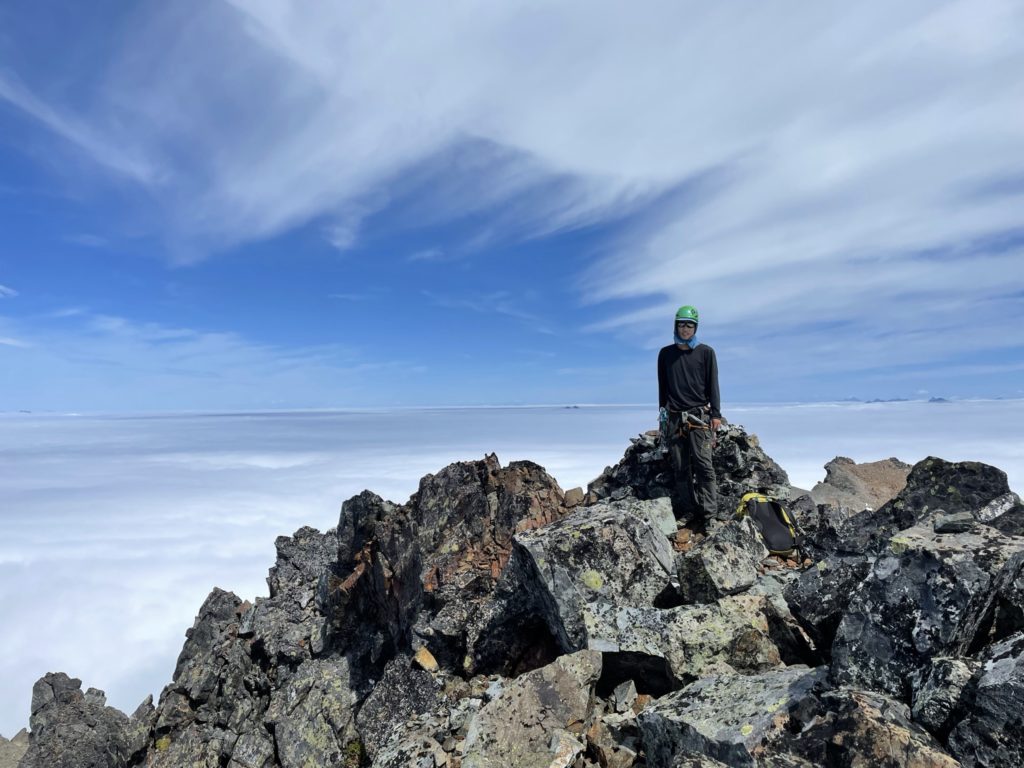
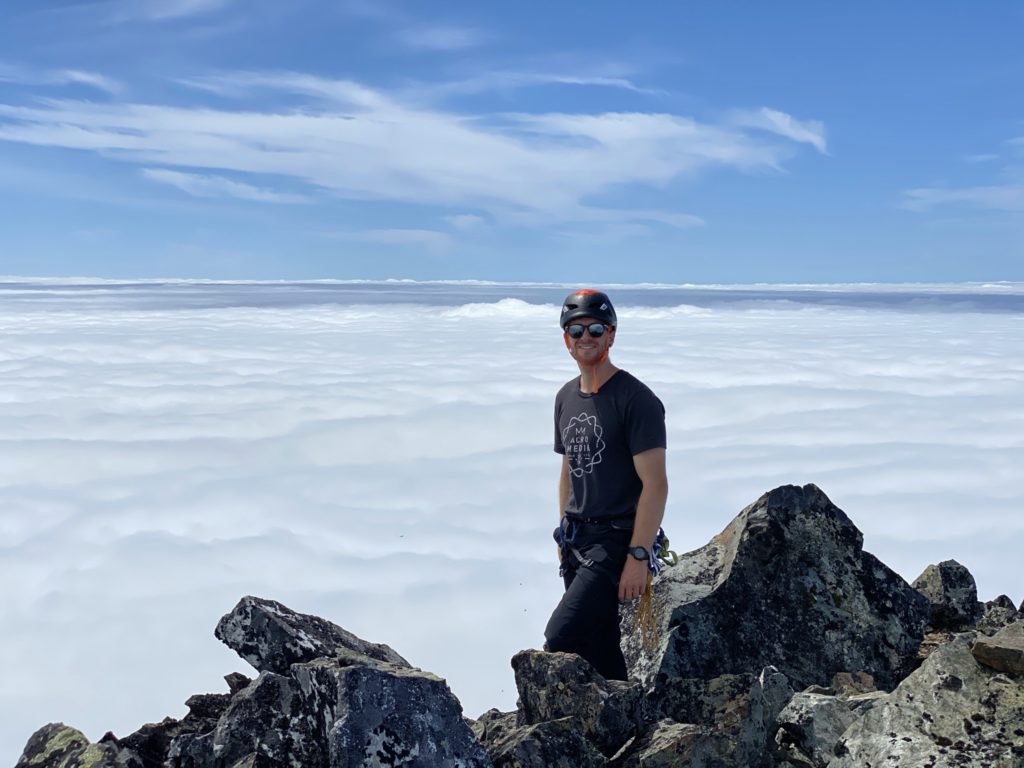
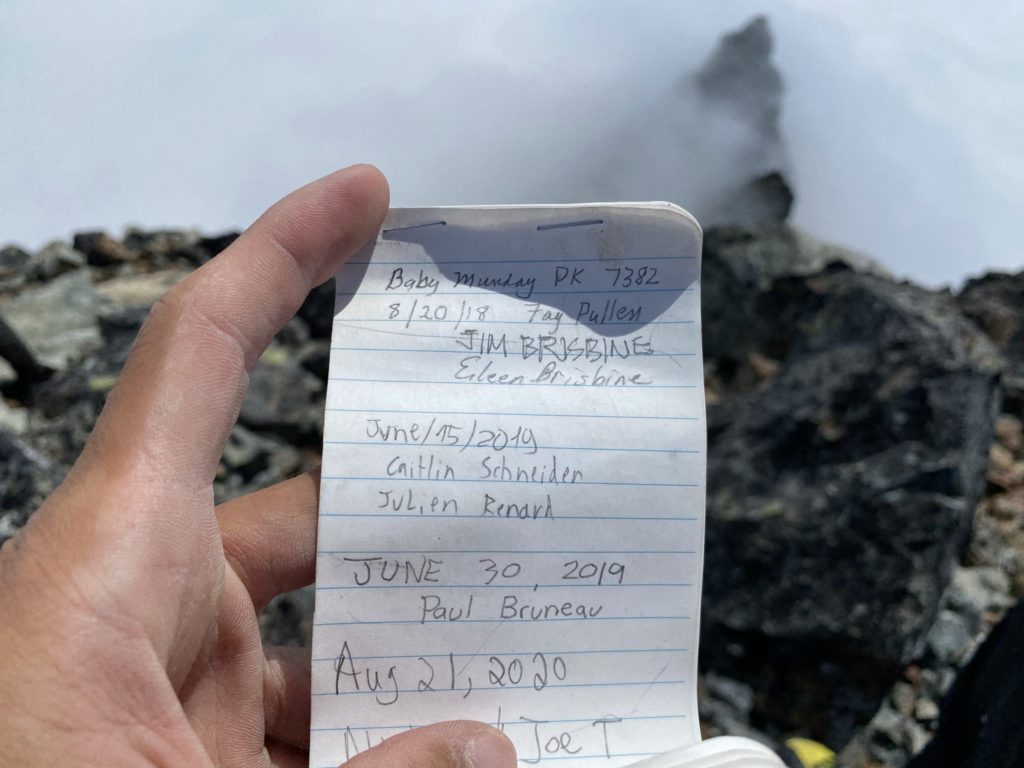
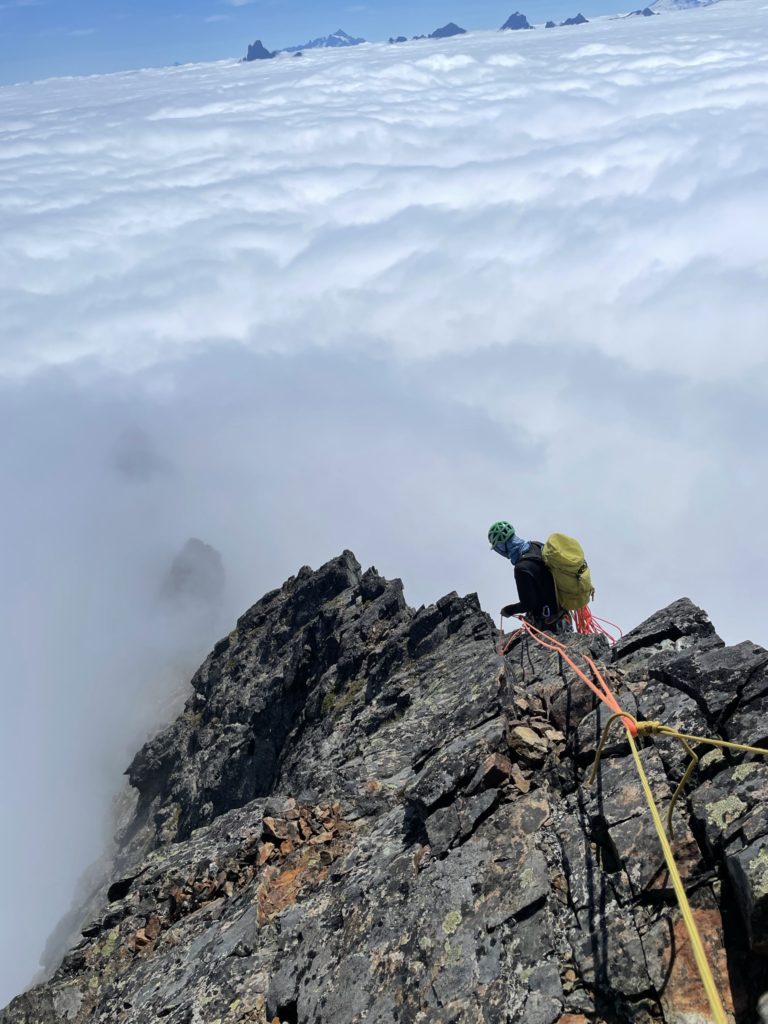
The summit itself is about 10-12m long and a 3-4 meters wide with a cairn and summit register at the northern most point. Here we sat down and chilled out for a long time. I took countless photos of the inversion and the sharp summit ridge line emerging from the clouds. I’m not sure how long we spent up there exactly, but shortly after Steven finished some lunch we made the decision to head back. The plan was to rappel down to the anchor station just below the summit and then a second rappel to the first anchor station we set up.

I had limited experience rappelling as well, so I had Steven give a second set of eyes on my rappel setup beforehand as he was heading down first to start another anchor. Steven started his way down and then after getting the go ahead, I started my descent as well. The movement was pretty jerky, but I made it down without much difficulty. Here we started the second rappel to anchor station and then repeated the process.
After the second rappel, we picked up the gear we left behind and continued on our descent. We were able to down climb a good portion of our ascent route, before reaching a tricky section. There was either a down climb over a very exposed part of the ridge or a more technical pitch that offered less exposure but still not a comfortable proposition. Steven made the decision to setup a third rappel which would save us from a few more tricky moves further down. After he finished his descent, I started to set up my gear, when I accidentally dropped my ATC on the ground. I watched in sadness as it bounced from rock to rock for a hundred meters down the slope and somewhere onto the glacier below. I started to think about backup options using either a munter hitch or some combination of prussiks, but after communicating with Steven, he opted just to tie his ATC to the rope and have me pull it up. With that out of the way, I started the next rappel down and then we were past most of the tricky sections.


The last hard part of the route now was the ledge traverse, which neither Steven nor I were keen on back tracking. I recalled seeing some slings around a rock anchor above one of the gullys on my first attempt up the south summit and relayed the info to Steven. We searched around the ridge line and eventually found the rappel station. Here we setup a rappel directly down the remainder of the western ridge to the scree slopes and were out of the technical terrain shortly after.
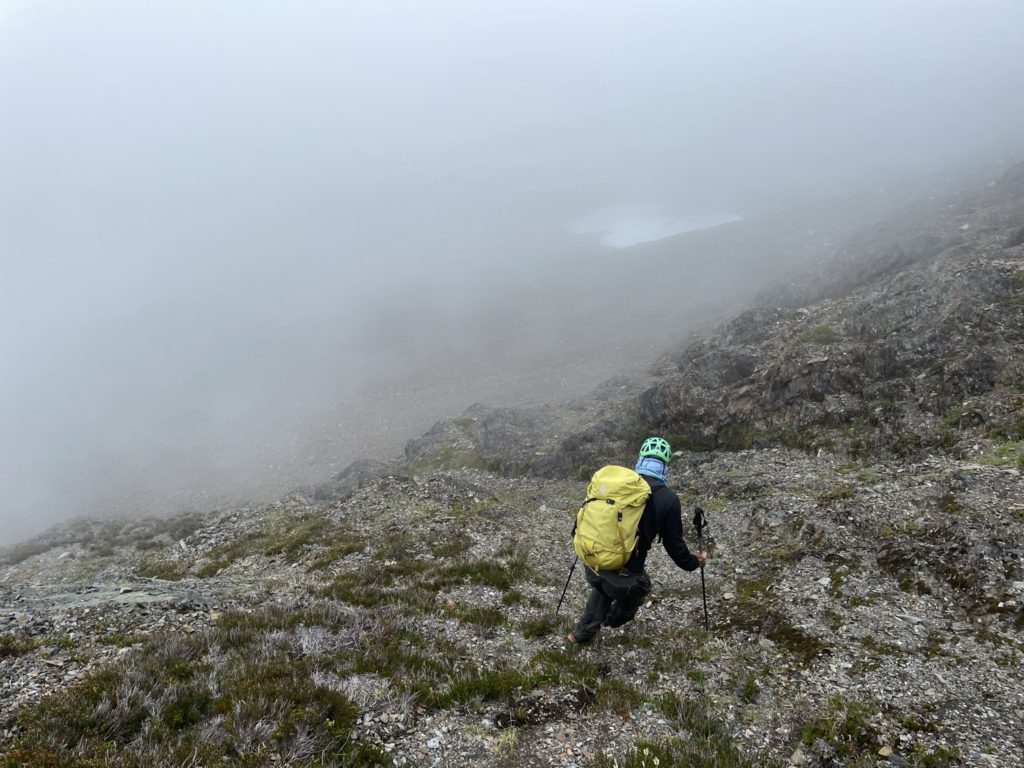
By now it was around 3:30pm and we were discussing going for Knight Peak. Unfortunately, I had plans in Vancouver for 9:00pm and with the long FSR drive, we weren’t going to have enough time. So the decision was made to head back to the truck with the main objective now successfully tagged. The descent back to the trail head was uneventful, albeit a bit slippery and we made it back to the truck for a round trip time of just over 9 hours.
Baby Munday made for a type 1 fun kind of day for me. I was new to this type of technical route, but I had an awesome time and I’m looking forward to trying something similar again! Thanks to Steven for leading this one and giving me some great information for tackling routes such as this.